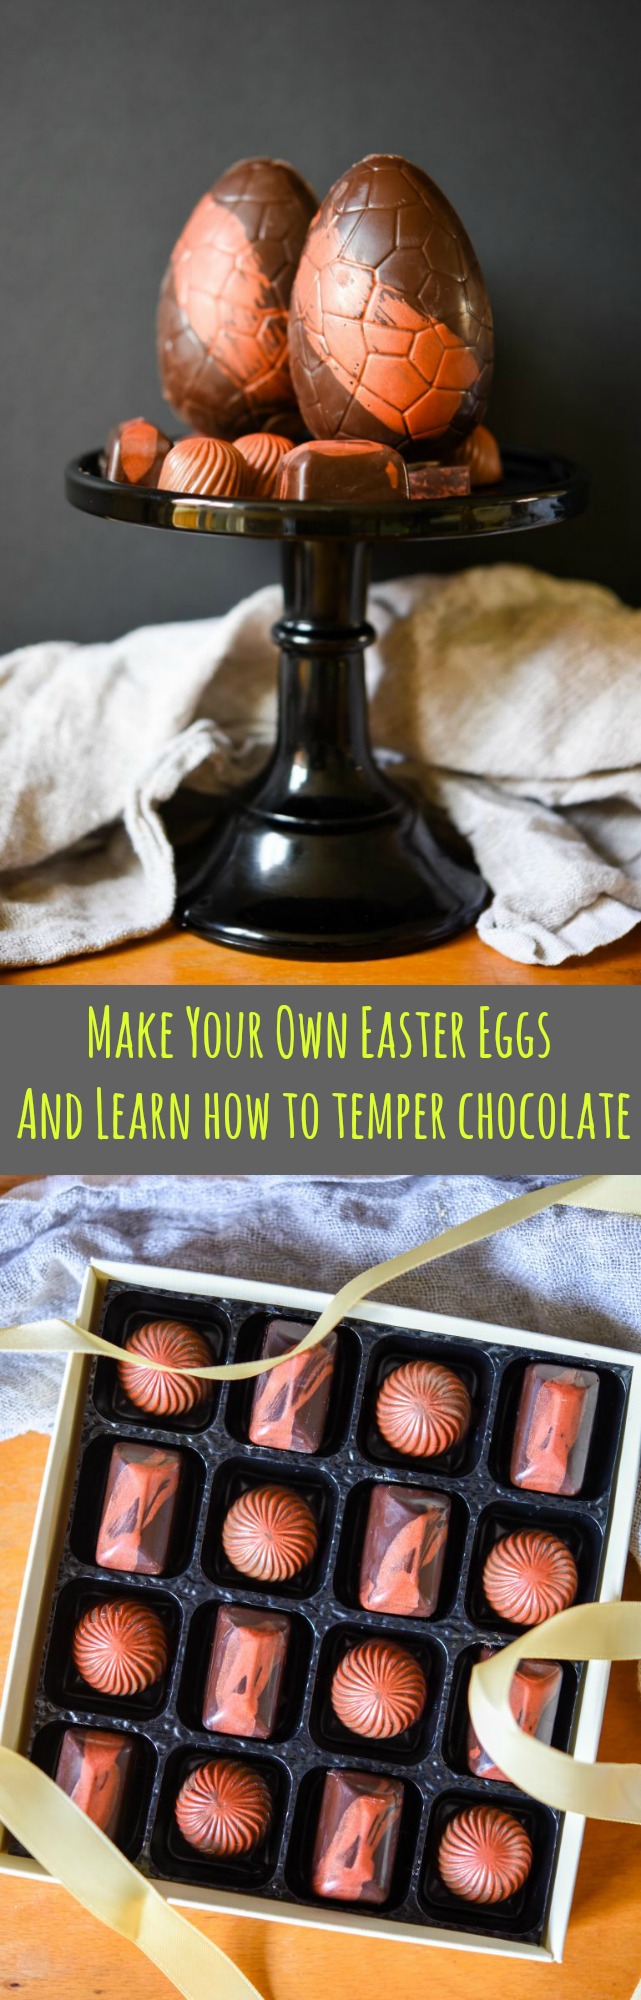
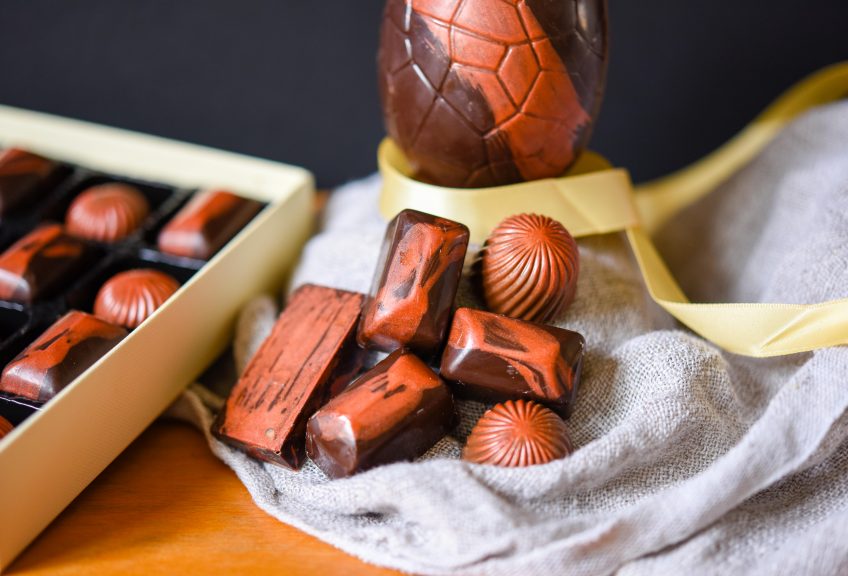
This blog post doesn’t really contain a recipe as such, it’s more a lesson in how to temper chocolate so that you can create your own Easter eggs and filled chocolates. I’ll start by saying you nearly always need more chocolate than you think you will to fill these chocolate moulds. So whilst the quantities I give may sound like a lot, it’s much easier to work with a lot of chocolate and then pour off the excess. As long as you keep the chocolate clean and uncontaminated, (i.e. don’t mix types of chocolate or get any of the fillings incorporated) the leftover tempered chocolate can then be set in silicone moulds and used again for tempering, or you can bake with it.
As I’m sure you all know, chocolate varies in price and quality. If you want to temper your own chocolate, you really need to buy the best chocolate you can afford. Brands like Dairy Milk, Galaxy etc, do not lend themselves well to tempering. You’ll make your job much easier if you buy couverture chocolate like Belcolade, Callebaut and at the higher end of the market, Valrhona and Amedei.
Let’s go into a bit of detail:
What is Couverture Chocolate? Couverture is a high-quality chocolate that has more cocoa butter than standard bars of eating or cooking chocolate. The extra cocoa butter and the fact the chocolate chips/callets/feves are already tempered makes the chocolate easier to temper for enrobing and filling moulds, it also promotes a better shine and snap.
What does tempering Chocolate mean? This term has really come into common usage and it feels like people are just expected to know what this means and how to do it. Tempering chocolate is when you melt couverture chocolate in a controlled manner and then add unmelted tempered chocolate to cool the chocolate to stop the formation of irregular crystals of cocoa butter in the finished product.
Why temper chocolate? Have you ever melted chocolate and when it sets, it’s more fudgelike than the bar you started with? Did it take forever to set? Did it have white swirls or marks on it when it set? Did the finished chocolate bend in two, rather than snap? If so, these are all problems you will experience because you haven’t tempered your chocolate. They will also affect the taste and texture of the chocolate. Tempered chocolate is stronger, will have a shine and will not take forever to set because it hasn’t got too hot in the first instance.
How to temper chocolate? There are a few ways to temper chocolate, but the easiest to do at home is the seeding method. The process is the same, but the temperatures you need to work within vary based on the type of chocolate you are working with.
Working temperatures for tempered chocolate:
Dark Chocolate (60%+) 31C-32C
Milk Chocolate (30%+) 30C-31C
White Chocolate 28C-29C
You will also need a digital thermometer, a stainless steel bowl and a saucepan half filled with water. Place 400g of chocolate in a very clean stainless steel bowl and set it over a pan of simmering water. You don’t want the water to boil because if any steam or water gets into your chocolate you won’t be able to temper it.
Heat the chocolate to 45C, don’t be concerned if there are still some pieces of chocolate that haven’t fully melted. You don’t really want to heat the chocolate higher than this, because you will waste a lot of time and use a lot of chocolate trying to cool the chocolate down.
Take the bowl off the heat and rest it on a towel to stop the bowl moving, add some tempered chocolate chips and stir the chocolate gently to melt the chocolate, keep adding chocolate and stirring until your chocolate cools to the desired temperature (see above). As an aside I would say don’t start tempering for the first time with white chocolate, as it can be one of the harder chocolates to temper as white chocolate can often separate. Start with dark or milk for your first time.
Your chocolate is then ready to use, you need to act fast as tempered chocolate sets very quickly. Try to keep all the chocolate together, as any chocolate on the side of the bowl will set. If you find your chocolate is beginning to set you can return it to the heat and very gently warm the chocolate again, but do not exceed the working temperature, if you do, you’ll need to add more chocolate and re-temper.
The method for tempering the chocolate is always the same, regardless of what you are using it for.
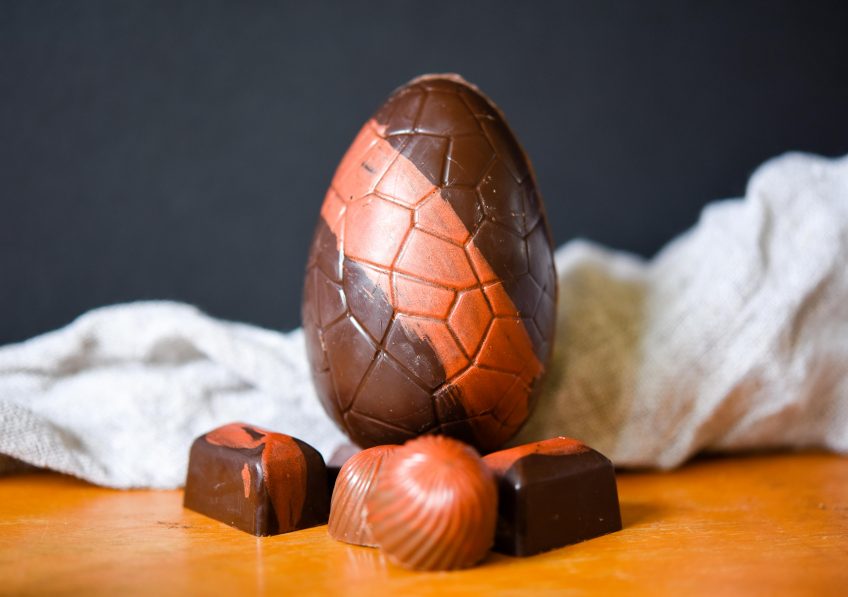
With that background information you’re now ready to start making your Easter eggs and filled chocolates. It’s taken me a while to work out the best mis en place and way of working to help make this as mess-free (you will end up covered in chocolate if you’re anything like me) and easy as possible. This might not be the best way for everyone, but it works for me, feel free to adapt it however you see fit, or ignore it entirely!
Before you start you need the following:
Digital Thermometer
Stainless steel bowl
Silicone Spatula
Saucepan
Chocolate Scraper
Polycarbonate Chocolate Moulds
Polycarbonate Easter Egg Mould
Cotton Wool
Coloured Cocoa Butter (optional)
600g Couveture Dark Chocolate
400g Couveture Milk Chocolate
Ginger Caramel
Morello Cherry Ganache
Teaspoon
Disposable piping bags
To begin, place the ginger caramel and cherry ganache in disposable piping bags, if the caramel or ganache are too set to pipe, warm them in the microwave on a very low heat for around 10 seconds. Put the fillings to one side.
Check that you have a shelf free in the fridge, you will place the chocolates in here in their moulds for a few minutes to help them set.
Clean your polycarbonate moulds with warm soapy water, dry them and then wipe them out with the cotton wool. Your moulds need to be completely clean as this will affect the look of your finished chocolate. Any remaining water will create bloom and make your chocolates white. Line these all up next to each other, so you can easily fill them.
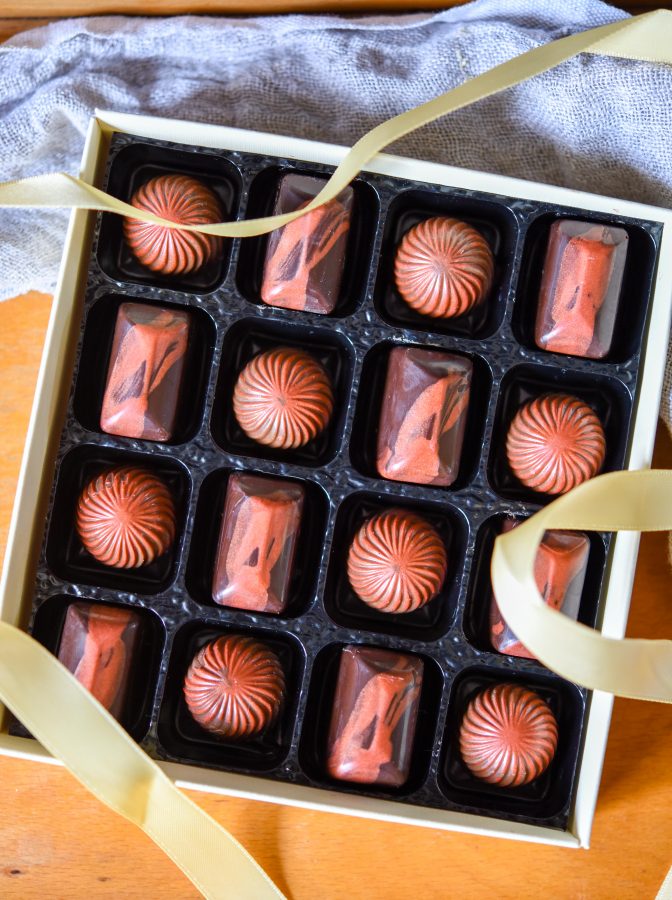
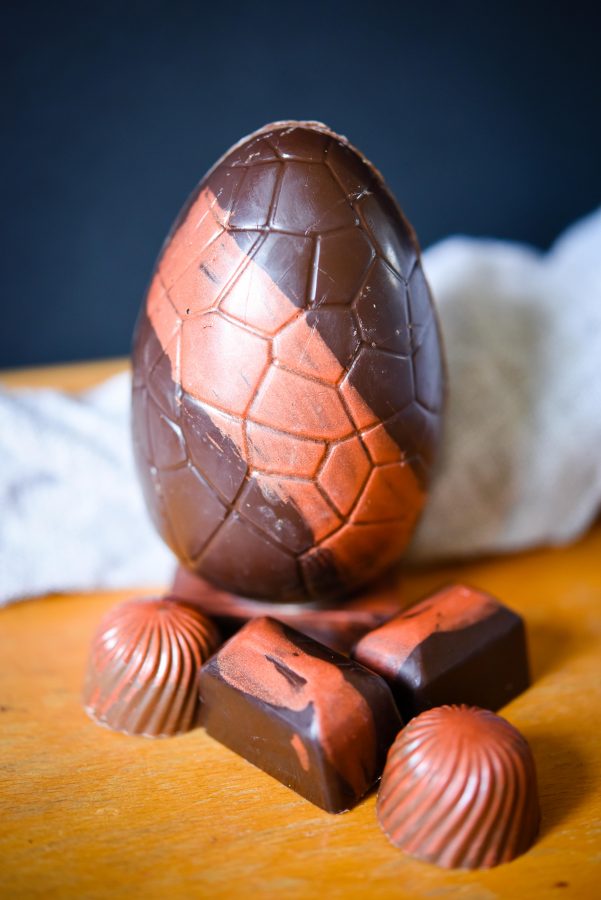
Warm your coloured cocoa butter in the microwave, according to the instructions on the bottle. Squeeze the melted cocoa butter into a small bowl and using either a paint brush, or your fingers, decorate the inside of the moulds with the cocoa butter. Leave to one side to set.
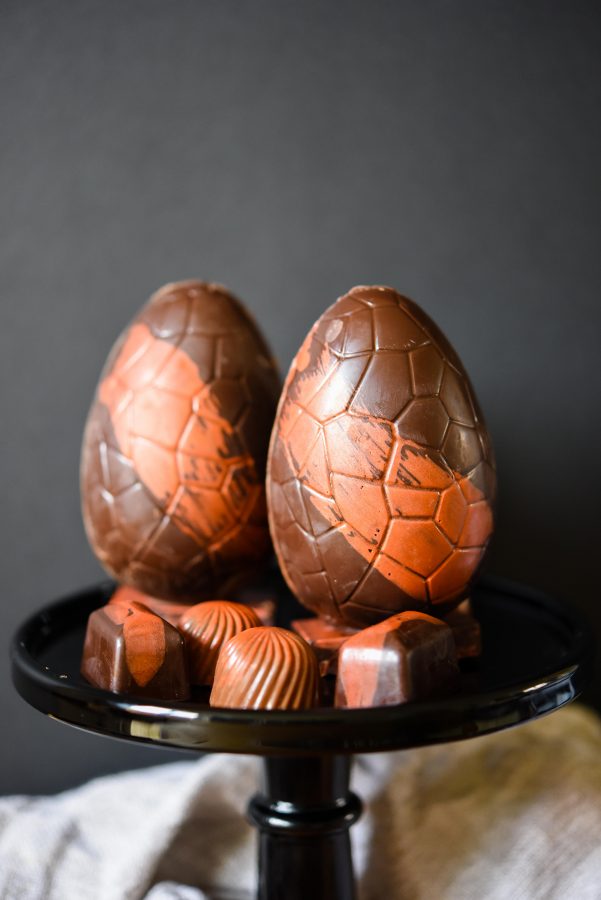
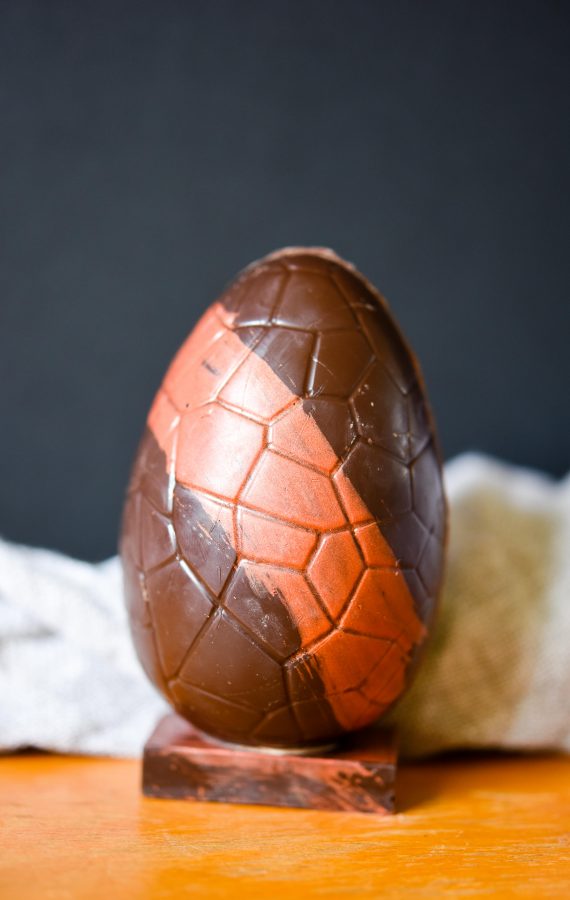
Start with the dark chocolate, temper it as per the instructions above. When the chocolate is ready, pour it into the Easter egg moulds and move the chocolate around so the whole cavity is covered in chocolate. Pour the excess chocolate back into the bowl of tempered chocolate and use the scraper to remove anymore excess chocolate and to give a neat edge to the mould. Give the moulds a few taps on the work top, you want to get rid of any air bubbles.
Place the egg mould in the fridge for a couple of minutes at the most to set. While that is setting, fill one of your chocolate moulds with more dark chocolate, it’s the same principle as the egg, move the chocolate around and then pour the excess back into the tempered chocolate.
Scrape off the excess using the scraper to get a neat edge to each chocolate, tap it hard on the worktop to remove air bubbles and then place the mould in the fridge for a minute or two to set.
Take the egg mould out of the fridge, add some more dark chocolate to build up the layers. If the chocolate is too thin it won’t come out of the moulds. so you need to build up the layers, this is only necessary for the eggs. Return the mould to the fridge and remove the other mould that will now have set.
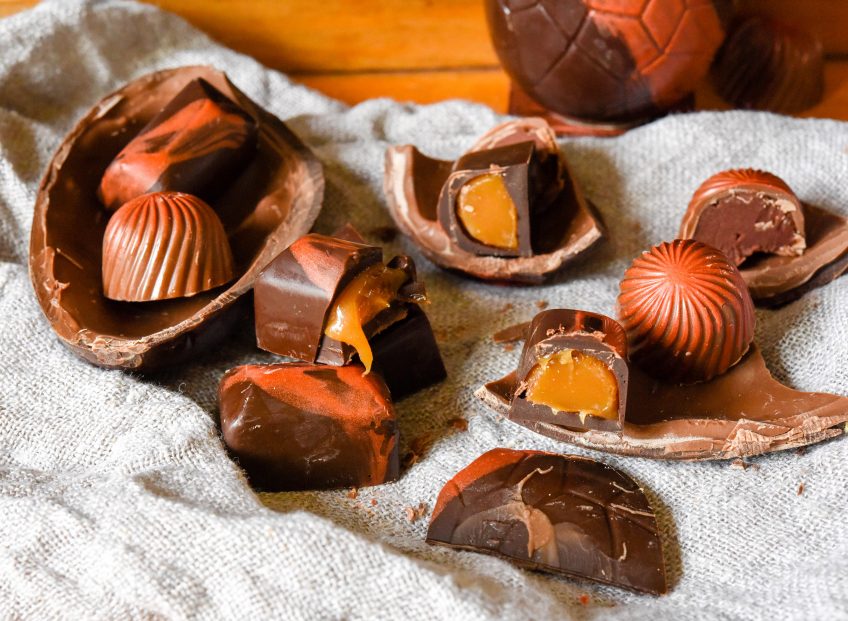
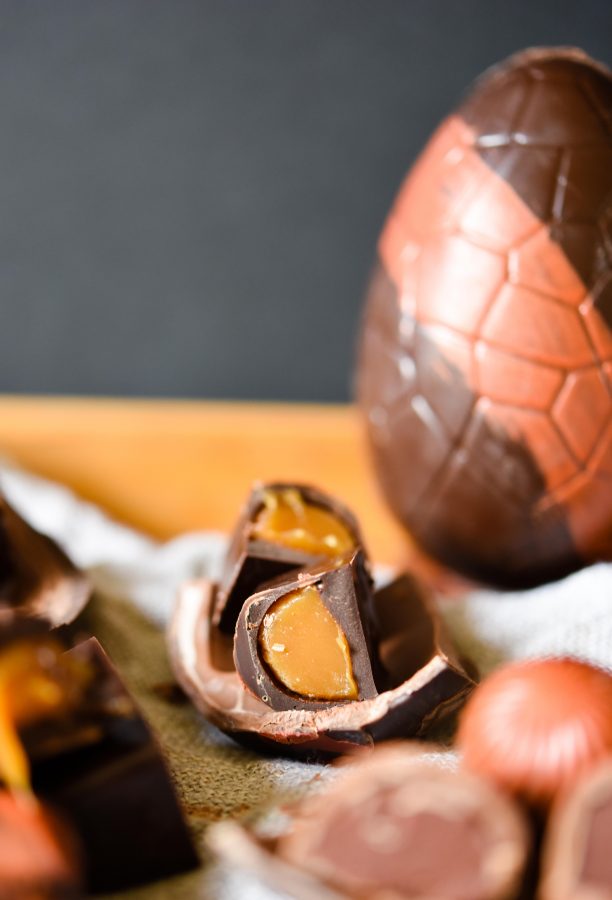
Snip the end off the disposable piping bag with the ginger caramel in and half fill the moulds with the caramel. Don’t be tempted to overfill the moulds, as the caramel will burst out and you won’t be able to seal the chocolates. I learnt this the hard way! Take a teaspoon and spoon small amounts of tempered chocolate on top of the caramel, making sure you can’t see any of the caramel.
Use the scraper to slide the chocolate over the mould and seal it, scrape the excess (as long as there isn’t any caramel in it) back into the tempered chocolate and ensure the chocolates are all neatly sealed and no excess chocolate is outside of the mould, as this can leave a foot on the chocolate.
Return the mould to the fridge and remove the eggs, adding another and probably final layer of chocolate to the eggs. Return the eggs to the fridge and take out the filled chocolate mould.
Lay a towel on the worktop, this is to turn the chocolates out onto, they can fall out with force and get damaged, this will stop them chipping.
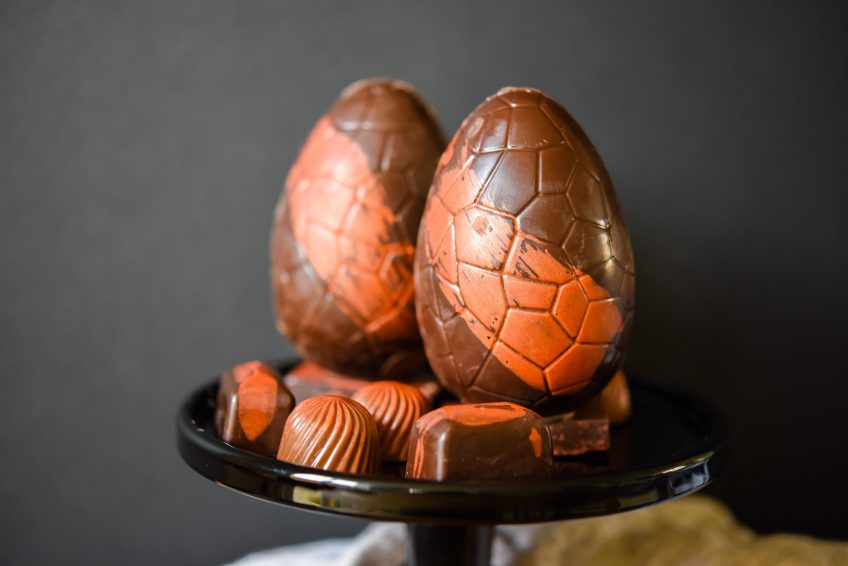
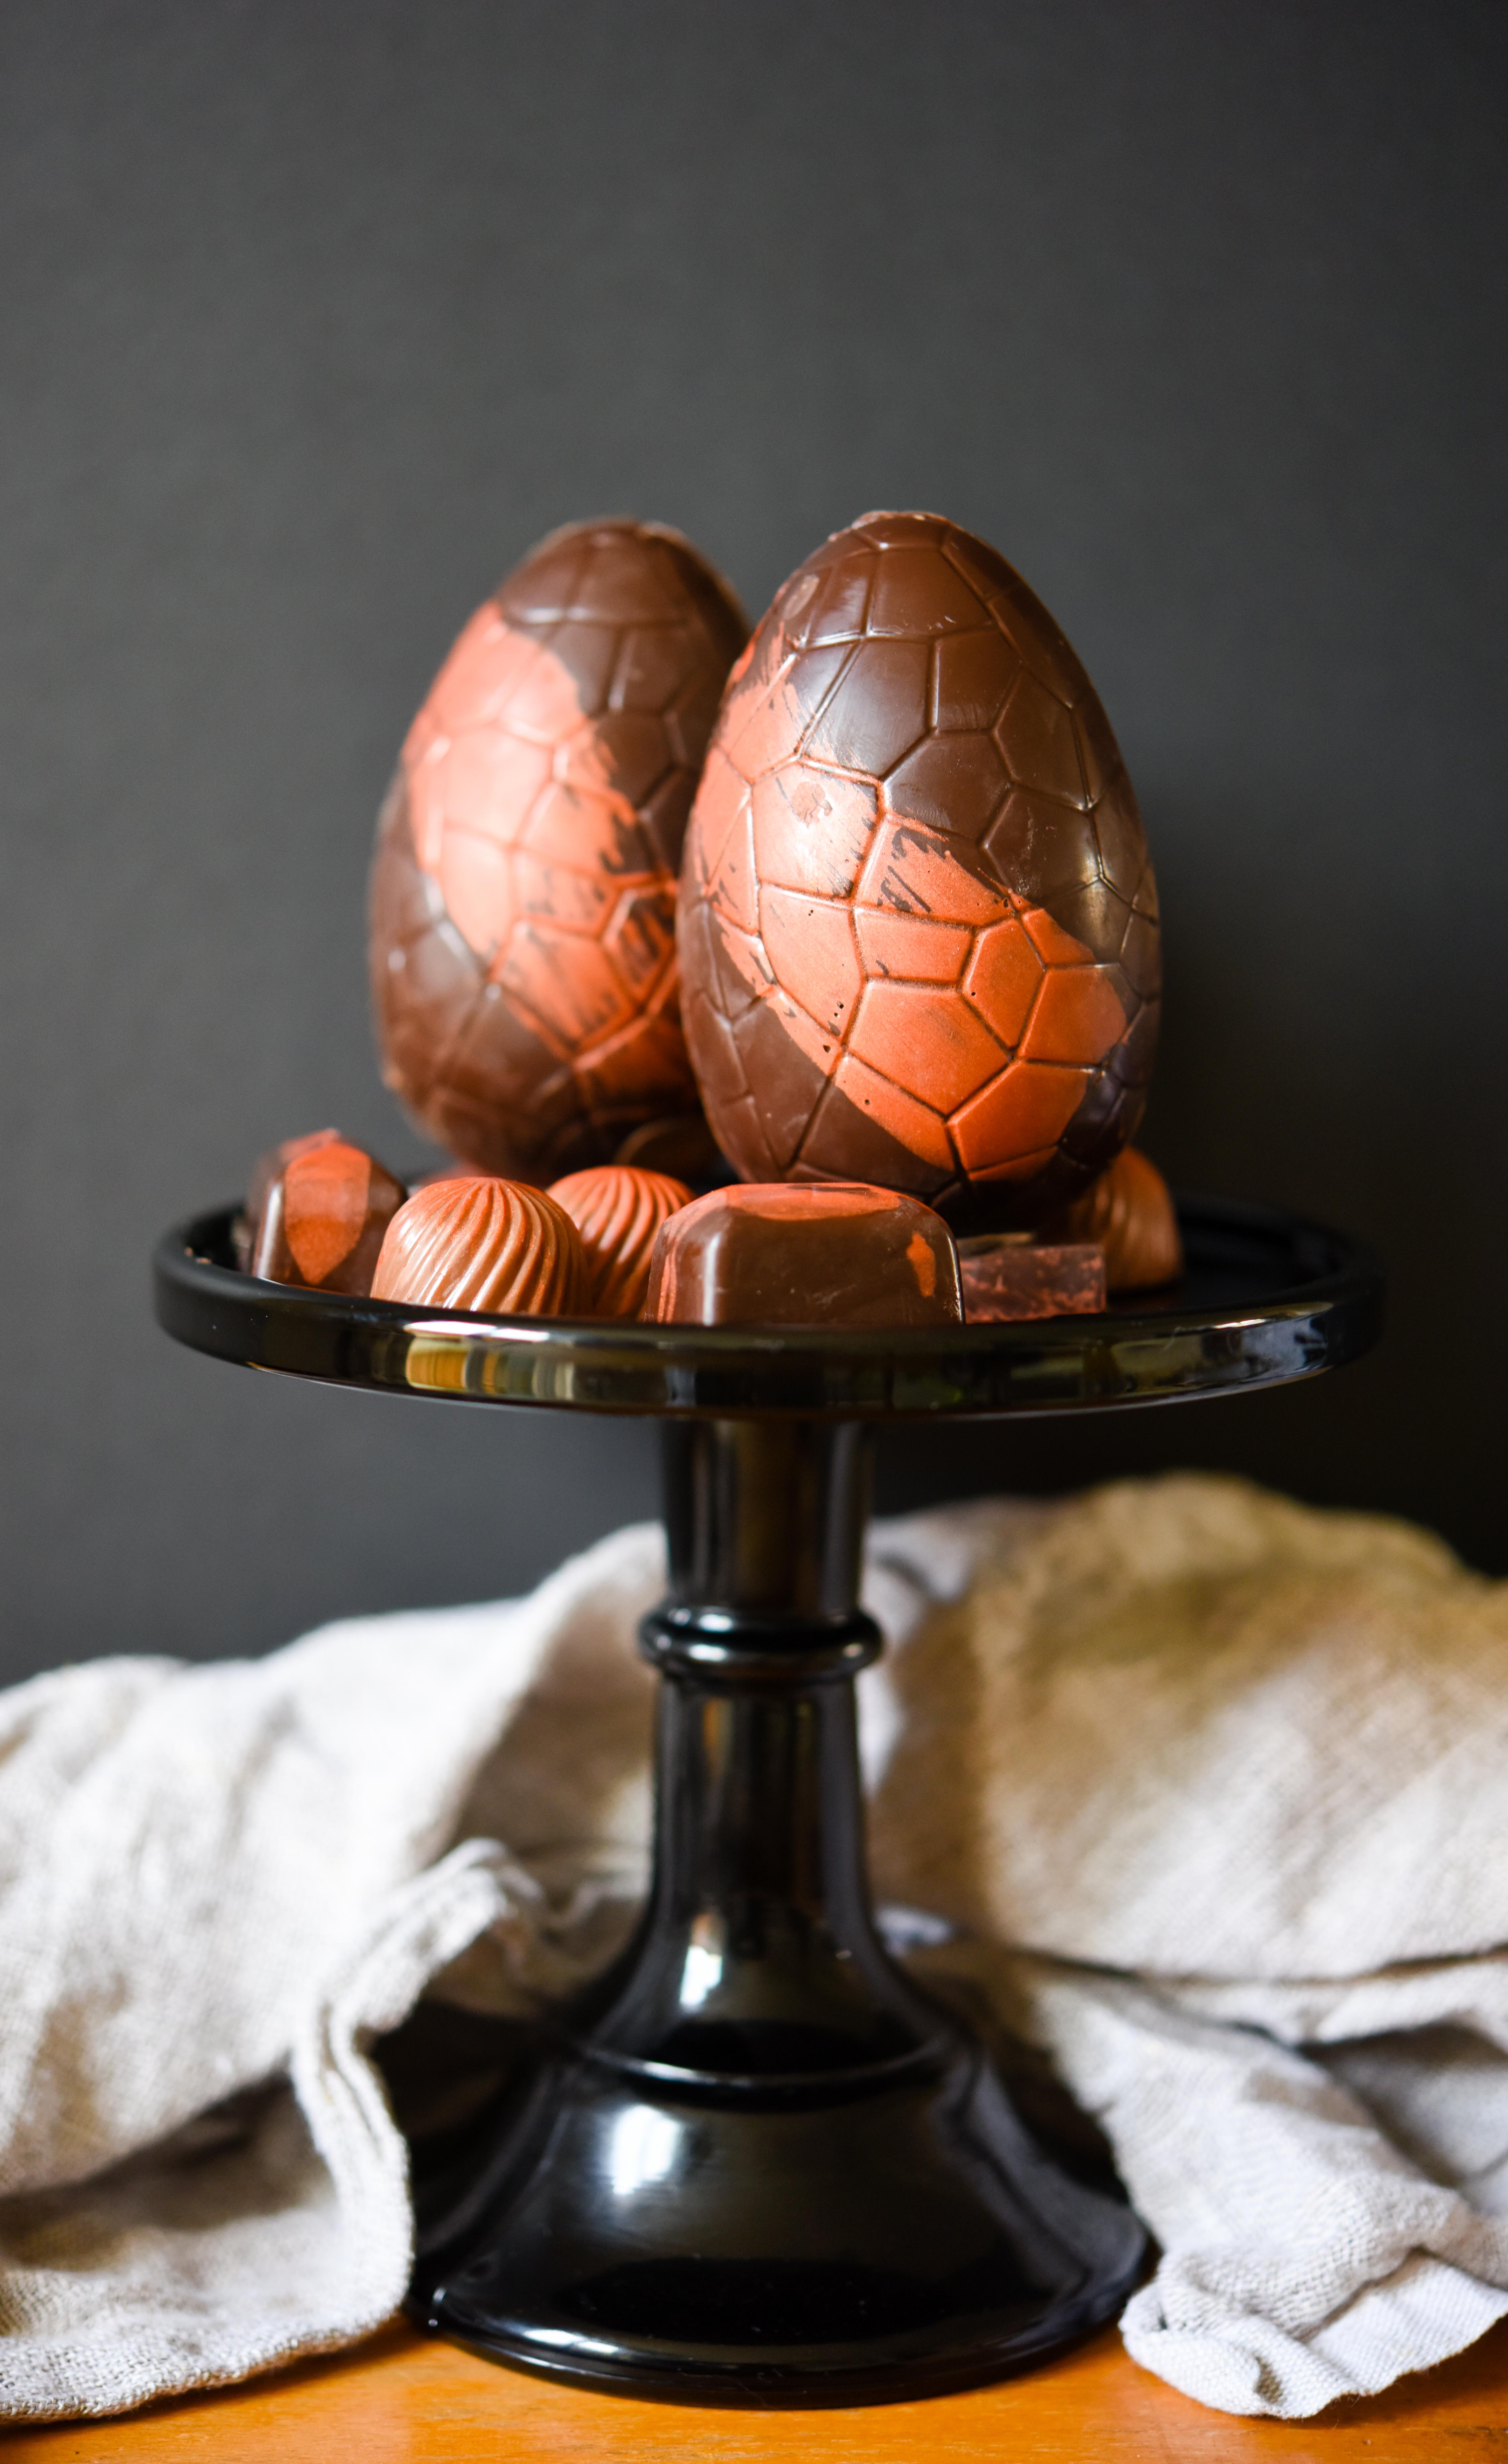
Turn the mould upside down and twist and turn it from side to side, the chocolates will fall out onto the towel with ease. This is how you know your chocolate is tempered correctly. Put the chocolates to one side and then do the same with the eggs. If they don’t fall out of the mould easily, they may need another layer of chocolate, so repeat the process again.
Take the excess dark chocolate and pour it into silicone muffin moulds, or a clingfilm lined bowl, just something that’s clean and will make the chocolate easy to remove when it has set.
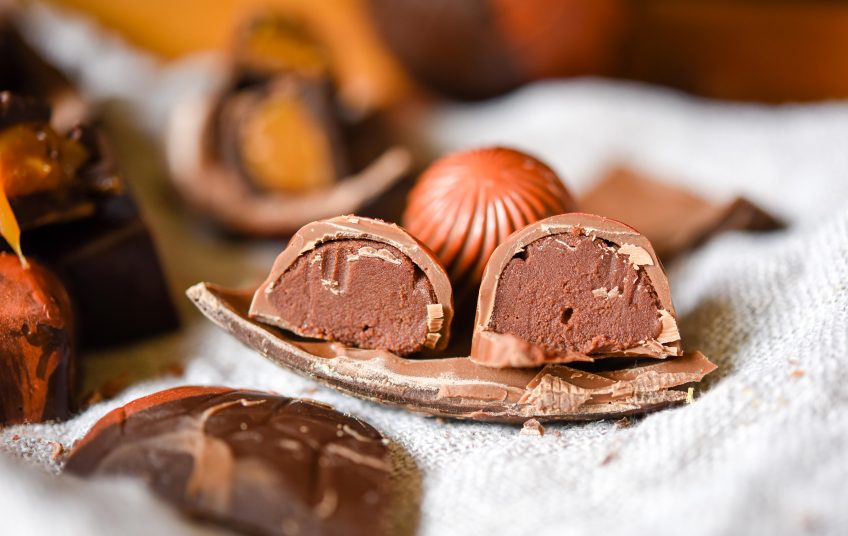
Or you can repeat the whole process again and make more eggs, the other filled chocolates are a mix of milk chocolate shells filled with the cherry ganache. The process is exactly the same as the ginger caramels, note there is less chocolate because you are not using this to make eggs as well.
These recipes are for your fillings and you will have some leftover, so you can always make more chocolates, but be sure to temper more chocolate if you do this. To make the morello cherry ganache, I used this puree from Funkin Pro.
Easter Eggs and Morello Cherry Ganache
Ingredients
Method
- Place the two varieties of chocolate in a bowl that is big enough to fit the puree as well.
- Place the morello cherry puree in a saucepan with the sugar and bring to a boil. Turn the heat off and give the puree about 30 seconds to cool down.
- Pour the puree over the chocolate and stir until combined and the chocolate is melted. Add the butter and stir until melted and incorporated.
- Place a layer of clingfilm over the ganache, make sure it touches the surface of the ganache and leave it to cool. Do not place the ganache in the fridge as it will set too hard.
Ginger Caramel
Ingredients
Method
- Place the whipping cream in a saucepan with the grated fresh ginger. Bring the cream to the boil and stir to make sure it doesn't burn on the bottom.
- Turn off the heat and leave the cream to infuse with the ginger and cool to room temperature. When the cream has cooled, strain it into a bowl or a jug, making sure all of the ginger has been removed.
- Add half the sugar to a heavy based saucepan and allow the sugar to melt on a medium heat, Add the rest of the sugar and heat it until it melts and becomes an amber caramel colour.
- Reduce the heat to low and slowly add the cream, it will bubble up and steam will escape, so be careful not to burn yourself on the steam.
- When all the cream has been added stir the caramel to evenly mix in the cream. Then add the salt and mix evenly.
- Finally add the butter and stir until it has all melted, transfer the caramel to a bowl to cool and cover with a layer of clingfilm, make sure the clingfilm touches the surface of the caramel so that you don't get any condensation.
Your finished creations will keep well in an airtight container outside of the fridge, preferably somewhere dark, the moisture in the fridge will cause the chocolate to sweat and absorb other flavours.
These should keep for 1-2 weeks, as there are no preservatives I wouldn’t recommend keeping the filled chocolates much longer than this.
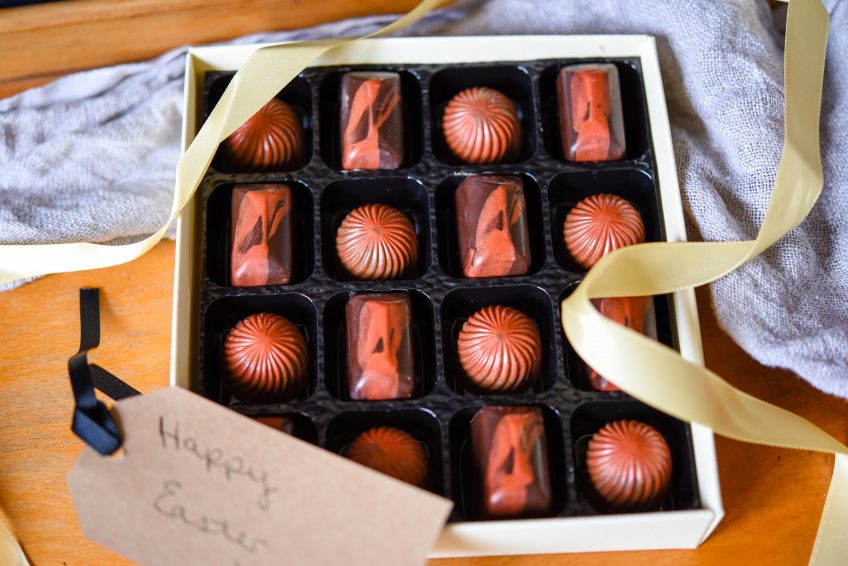
You can wrap them in cellophane or store the chocolates in a box to serve to friends. I hope all of this information and the links I’ve included mean you’ll be in a position to make some of your own chocolates and Easter eggs.
Have a great Easter everyone! I cannot wait for my few days off, hope you’re all doing something nice with your time!
Thanks for reading.
Angela


Jodie Dodd
I love the pops of color you’ve added to the chocolate! And this brings back such great memories! I always made chocolate at Easter with my mom and so did my kids. Loved making bunny suckers and ducks filled with peanut butter. Was so hard not to eat the warm, melted chocolate! We always melted the chocolate in an electric skillet in case we didn’t finish and could easily cover the chocolate then warm it back up. 🙂 xx
patisseriemakesperfect
Thank you Jodie. I’ve never heard of a bunny sucker! It sounds naughty 🙂
Sarah
These are really stunning chocolates. I’ve always loved eating spiced chocolate or strangely flavoured ones that I’ve bought in Europe (such as poppy chocolate, which I’m assured wasn’t opium flavoured). But I’ve never really gone out of my way to get plain or milk Couveture chocolate until now. I’ve been inspired this Easter to resist the consumerist battlegrounds that are the Easter egg aisles at Tesco to try my hand at my own, and this is certainly a comprehensive guide to help me start that. Thanks!
patisseriemakesperfect
Thanks Sarah, I’m so glad this post is of some use to you and those chocolate flavours you have mentioned sound amazing.
Do try making your own chocolates – it’s so rewarding.
Sugar et al.
You are amazing! These are incredible and so lovely of you to share these tips
patisseriemakesperfect
Thank you Sonali 🙂 These were such fun to make, I want to make even more chocolates now!