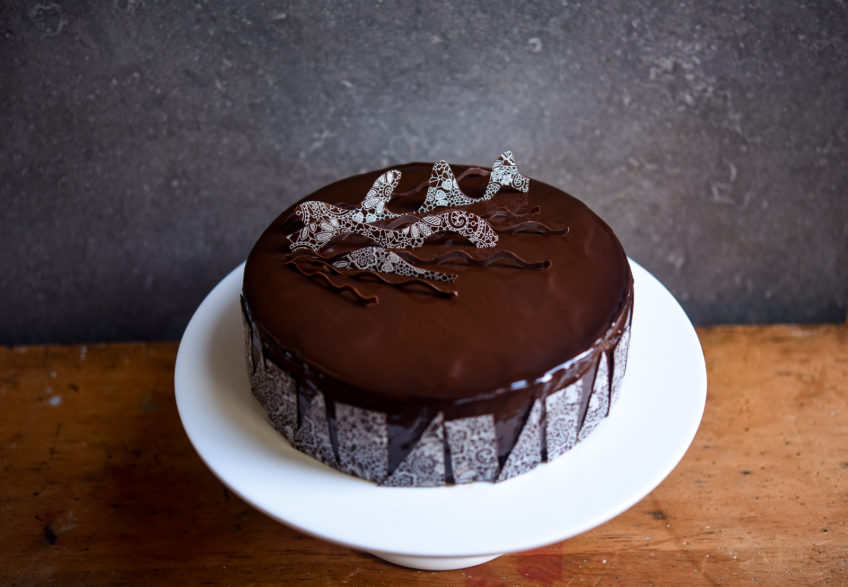
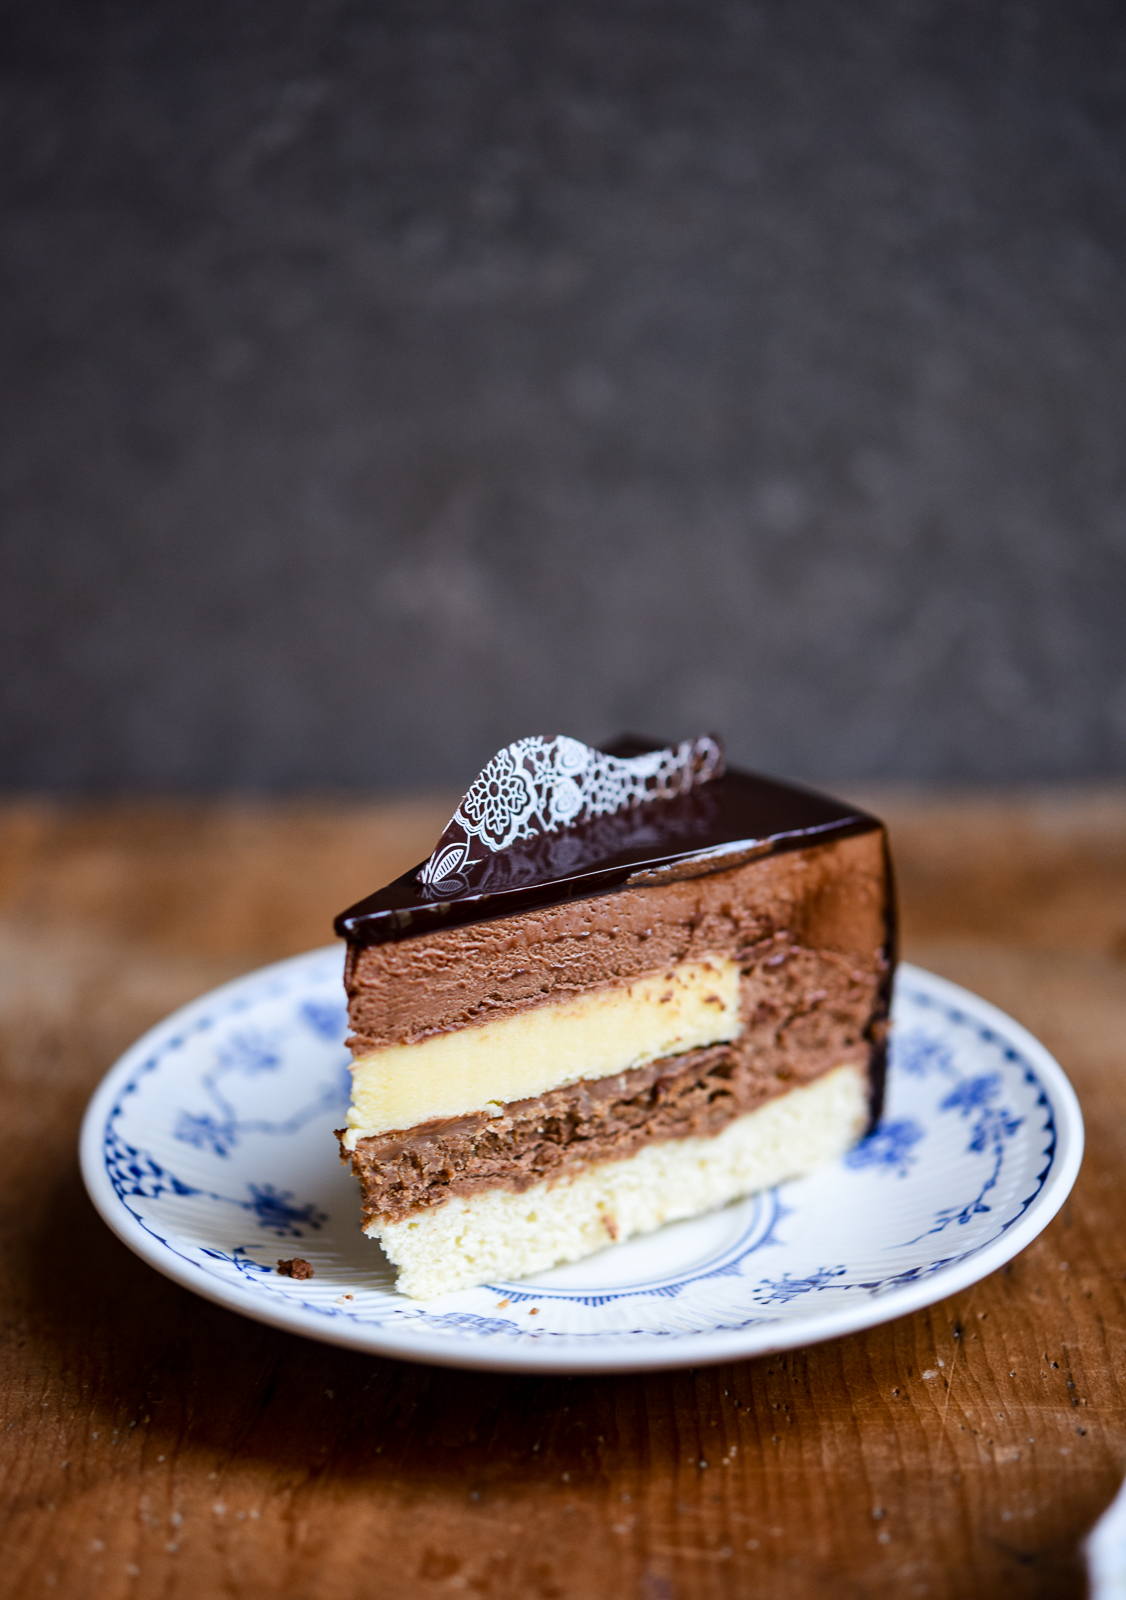
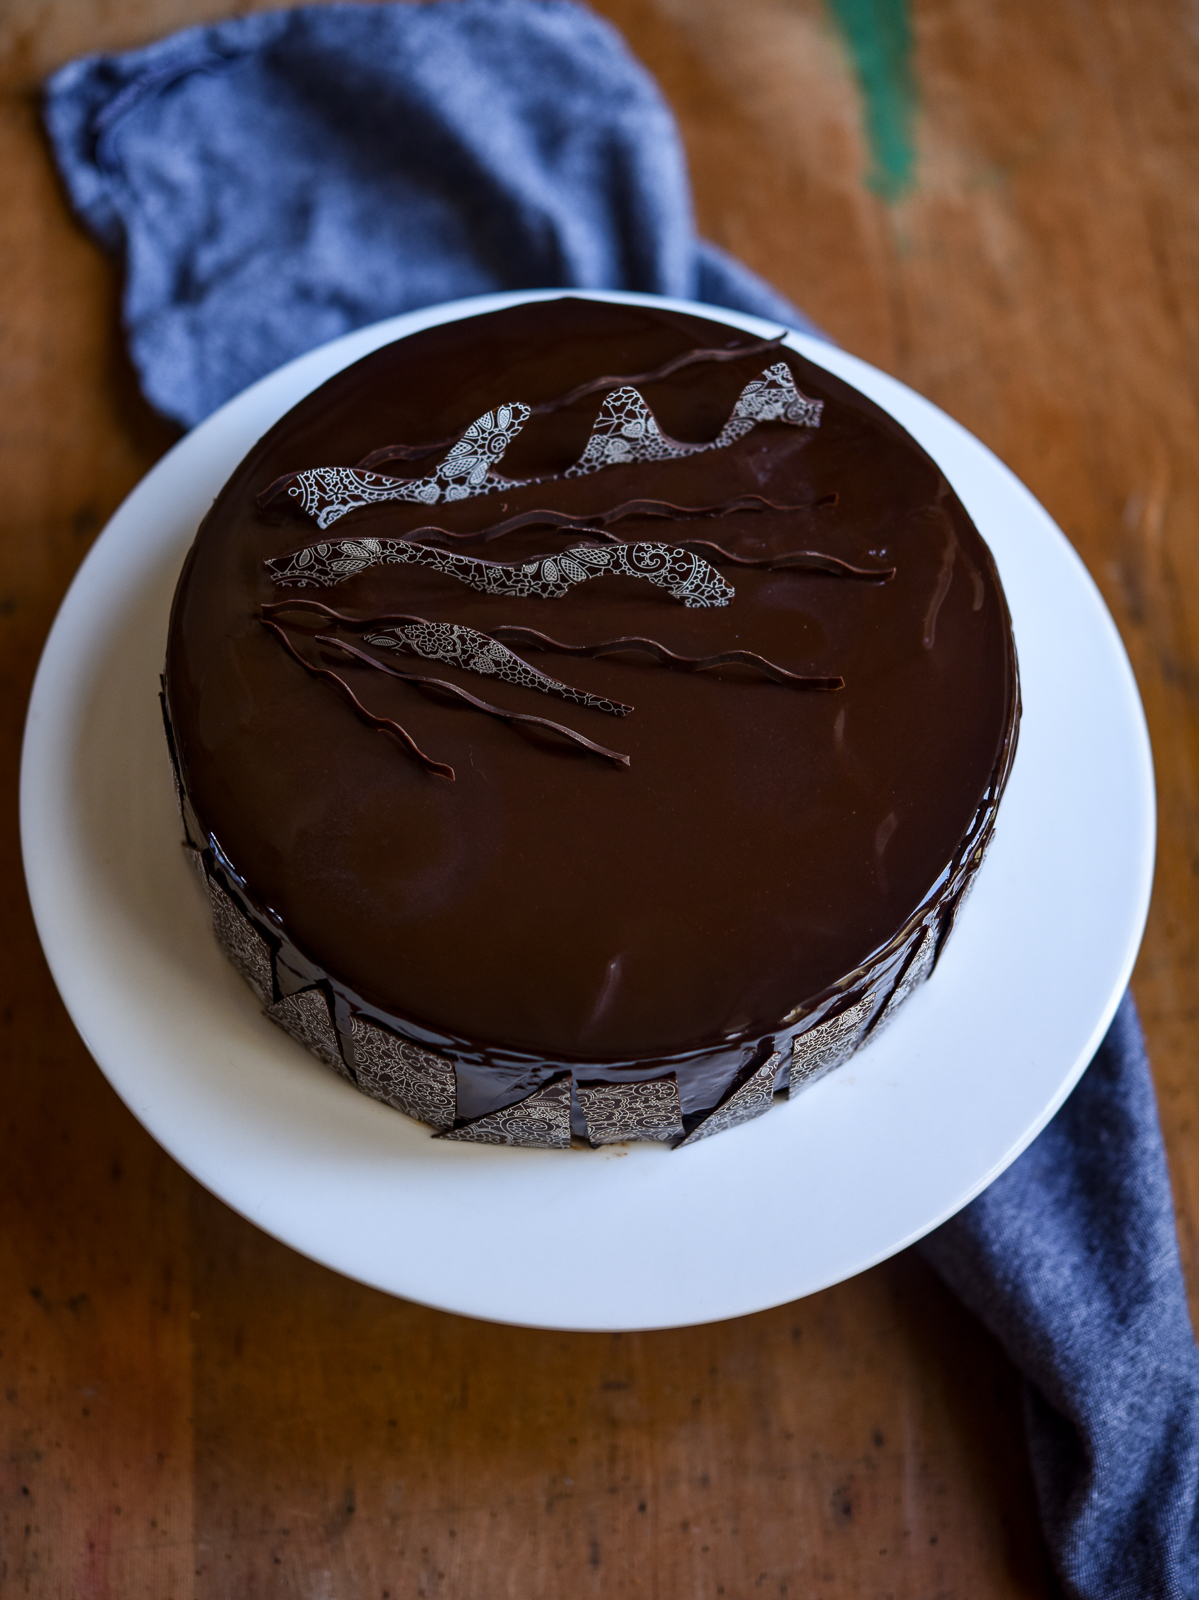
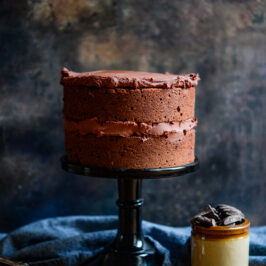
Entremets are one of the most searched for recipes on my blog and one of the biggest hits from google. So I have created a chocolate orange entremet and have tried to explain in the recipe, step by step how I go about creating them in a normal domestic kitchen with limited equipment.
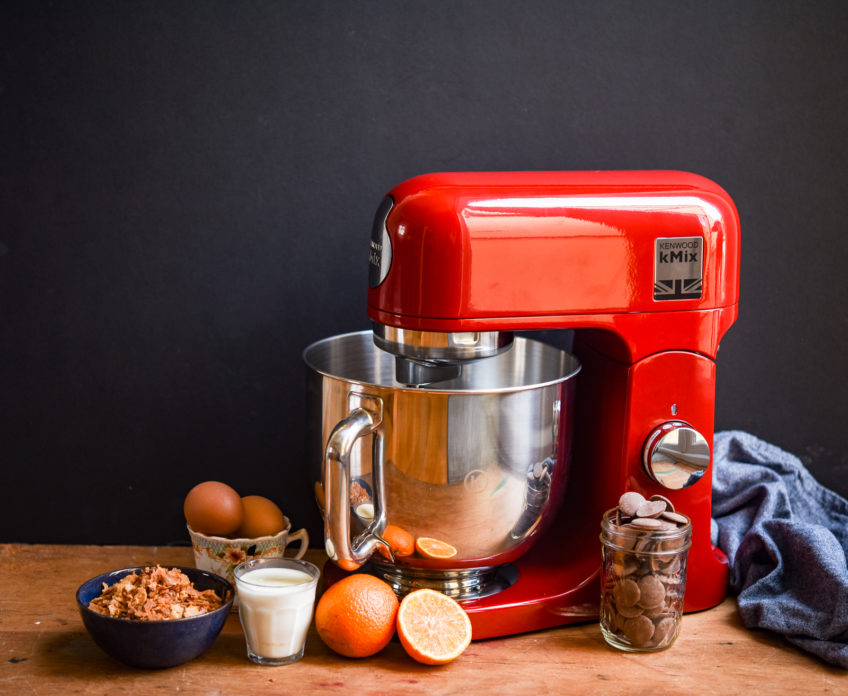
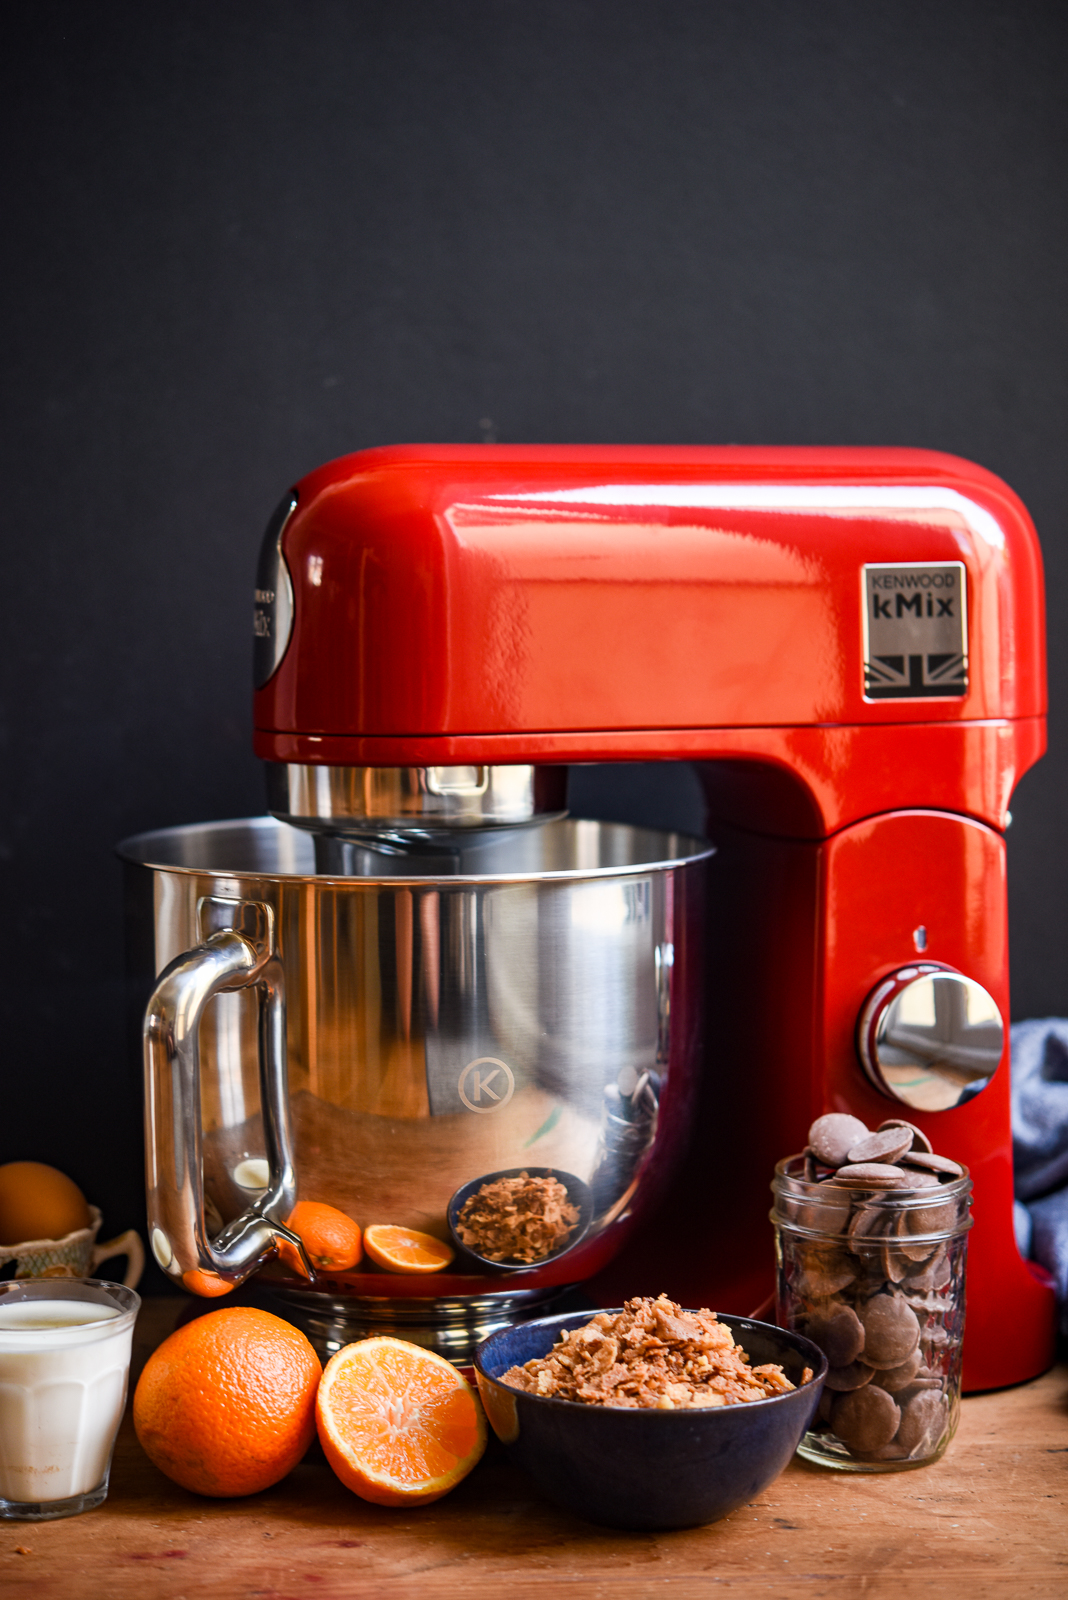
For this post, I was sent a Kenwood kMix to use. I really do recommend a stand mixer to help with your patisserie and viennoiserie, they are indispensable, they do all the hard work for you and they leave your hands free to get on with other jobs.
If you visit my instagram account, I have created a number of IG stories to accompany this blog post and I also have some IGTV videos to give you an insight into the equipment I used and my set-up. I really do suggest you watch these videos before attempting this chocolate orange entremet, especially if it is your first time making one.
The first time I made an entremet I tried to do the whole thing in one day. It was a huge failure, by the end of the day I was exhausted. I had partially melted the entremet with the glaze, because the glaze was too hot and I hadn’t allowed enough time for the entremet to set before glazing.
Therefore, my most valuable tip for making an entremet is to view it as if it is a collection of separate recipes and tackle them individually. As much as I try to be accurate when writing recipes, the length of time taken to create something is so variable and it can really throw out your timings if you decide to attempt too much in one day. Familiarity with the recipe, oven timings, fridge timings and just life getting in the way of making something – the knock at the door, someone in the house wanting to ask your opinion on something, it all affects the prep/cooking time.
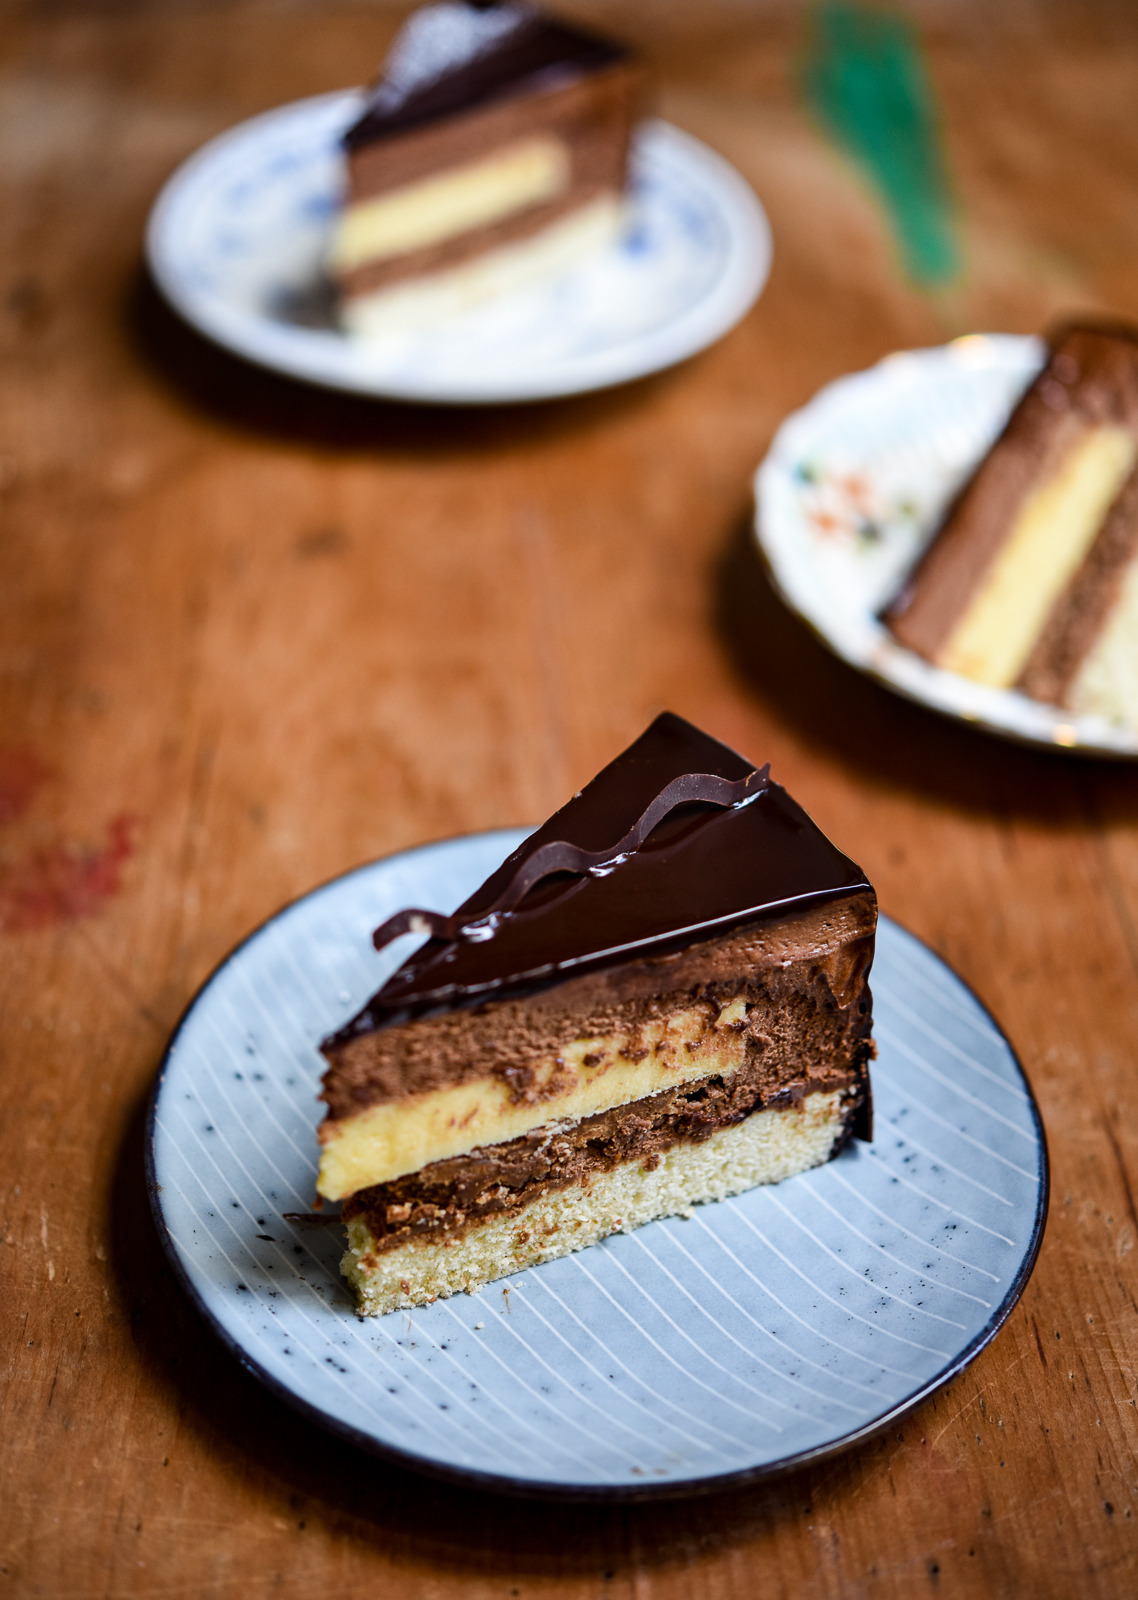
My other tip would be that for your first attempt at an entremet, follow someone else’s recipe, like this chocolate orange entremet. Then when you’ve mastered it, take the same recipe but start playing around with the flavours. For example the set orange curd in this recipe could be changed to lemon, lime or raspberry. The genoise could be changed to a dacquoise, a joconde, a chocolate sponge.
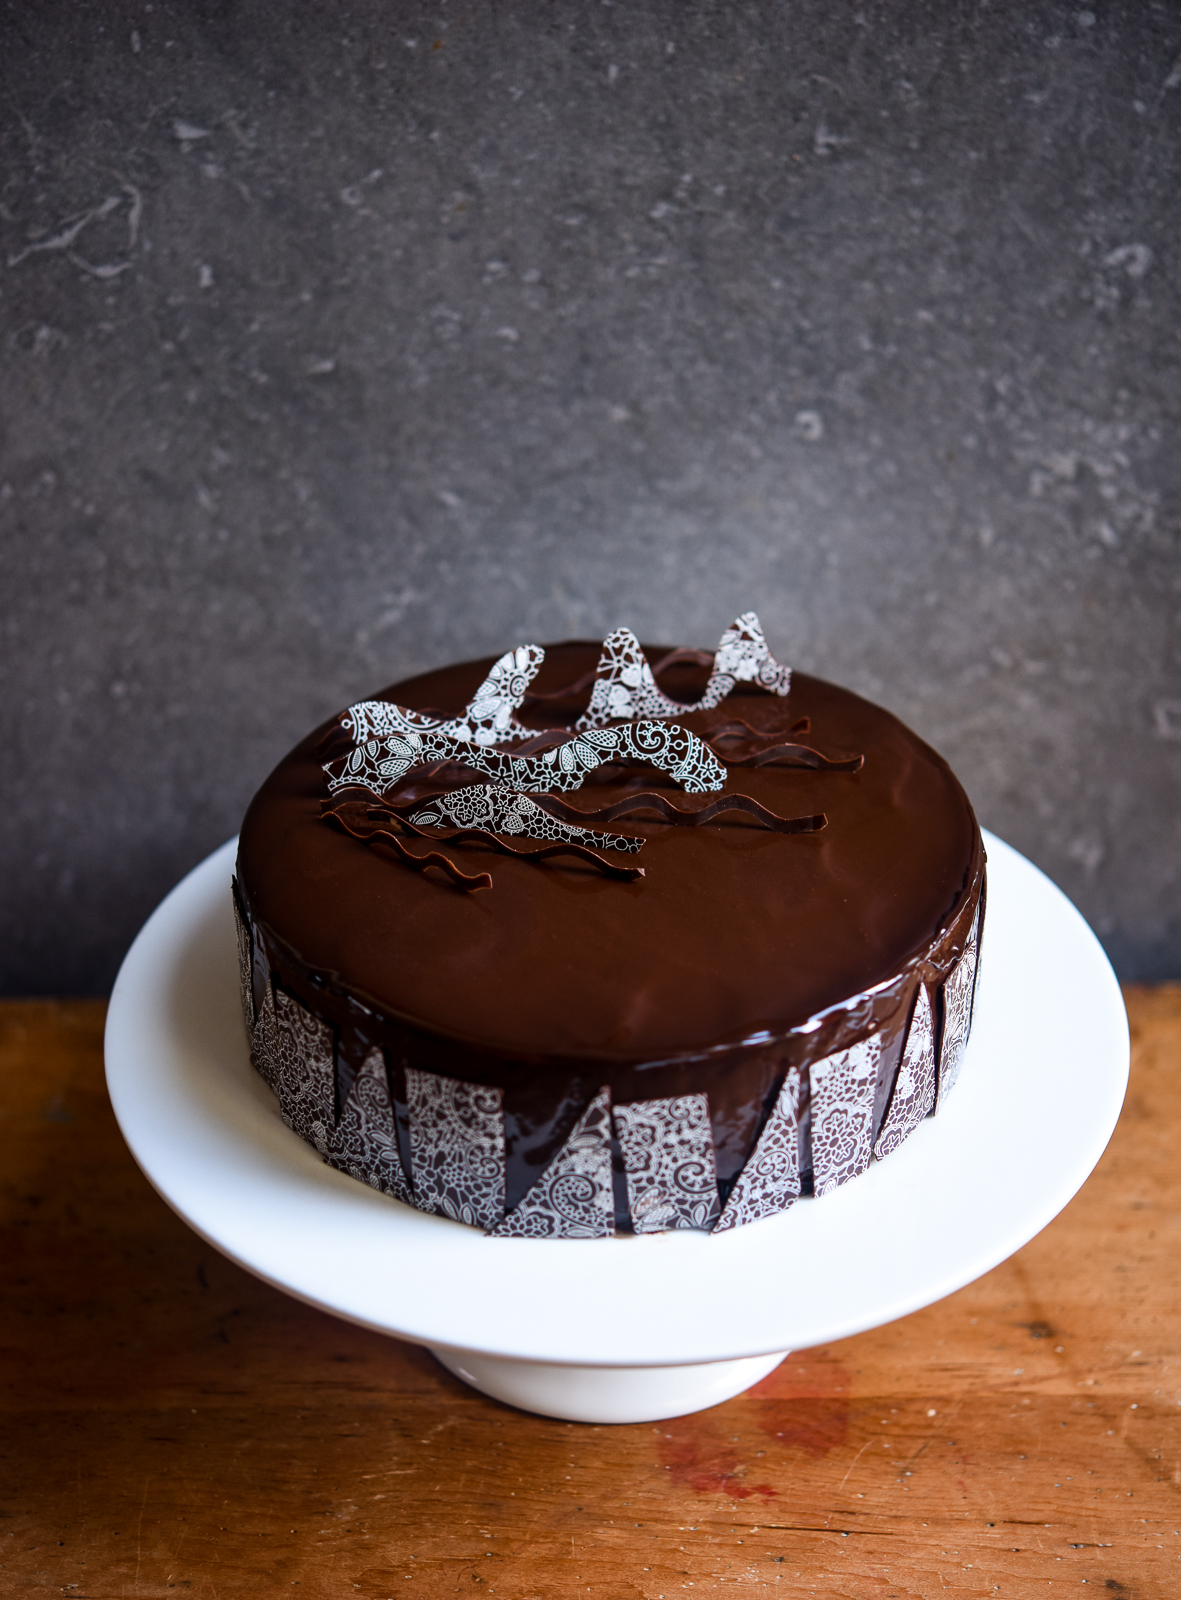
You see what I’m getting at, suddenly one cake ring and one recipe allows you to create a whole host of different entremets that can be decorated in a host of different ways. Fresh fruit, crystallised nuts, candied fruit, cacao nibs, gold leaf and tempered chocolate decorations are just some of the decorations you can use.
Entremets taste wonderful, they are so much easier to make than you think and they are very forgiving, I made this one over 4 or 5 days and the finished entremet lasted well in the fridge for 5-6 days kept in an airtight container.
Take a look at the recipe below, I have explained in the notes which items can be made in advance and keep well and detailed all of the equipment you will need, including when to use your stand mixer and which attachments you’ll need. So read the recipe through a few times and make sure you have all of the ingredients and equipment you need before you even start baking.

Ingredients
Equipment
Method
- Begin by making the set orange curd, take the 200ml of orange juice and boil it in a saucepan until it has reduced to 100ml and is concentrated. Leave to one side to cool a little.
- Take the gelatine and place it in a bowl of cold water to soften.
- Whisk together the eggs and sugar in the bowl of a stand mixer until they are light and fluffy. Add half the reduced orange juice to the bowl and whisk again briefly.
- Return all of the mixture to the saucepan and cook the curd over a low heat, stirring continuously for 5 mins until it starts to thicken.
- Remove the pan from the heat, squeeze the excess water from the gelatine and then stir the gelatine into the curd until completely dissolved.
- Strain the curd through a sieve into a bowl and while still warm stir in the softened cubed butter piece by piece until it is melted and incorporated into the curd.
- Take a 16cm loose bottomed cake tin and spread a layer of cling film in the bottom of the tin and up the sides. Pour the curd into the lined tin and spread the curd out evenly. Take another piece of clingfilm and press it to the surface of the curd so that it is touching it, this will stop any condensation or a skin forming. Place the curd in the fridge to set.
- Next make the praline feuilletine layer, take the chocolate and place it in a bowl over a pan of simmering water. Melt the chocolate until it reaches 45C, you may find you still have some small pieces of chocolate, remove it from the heat and keep stirring until all of the chocolate has melted.
- Stir in the hazelnut praline paste and then the feuilletine, take another 16cm loose bottomed cake tin and spread a layer of cling film in the bottom of the tin and up the sides. Spread the praline feuilletine into the tin in an even layer and again press a piece of clingfilm gently to the surface. Place this in the fridge to set. Make sure nothing is exposed as the chocolate will absorb the moisture in the fridge.
- Next make the genoise, take a 23cm cake tin and line with baking parchment and grease the sides of the tin.
- Place the eggs and sugar in the bowl of a stand mixer and then place this over a pan of boiling water. Whisk until the mixture reaches a temperature of 37C. Remove the bowl from the heat, return it to the stand mixer and whisk until the batter has reached ribbon stage.
- Take the flour and gently fold it through the egg and sugar mixture, when the flour is two thirds folded through take two spoonfuls of the mixture and stir it into the melted butter.Return the butter mixture to the egg and sugar mixture and stir until the flour is completely mixed in.
- Pour the batter into the prepared cake tin and bake in an oven preheated to 190C Fan for 15 minutes until golden brown and the sponge springs back when pressed gently.
- Leave the cake in the tin to cool for about 10 mins, then run a knife around the edge and release the cake from the tin. Place the cake on a rack to cool and when cooled remove the greaseproof paper and wrap in clingfilm, save it for use later. The cake can be frozen or stored in an airtight container.
- Next make the cointreau syrup, put the sugar, water and vanilla extract in a saucepan and bring to the boil. Let the mixture boil for 2-3 minutes and then let it cool completely before adding the cointreau. Store in an airtight container in the fridge for up to a month.
- Next make the dark chocolate glaze, soak the gelatine sheets in a bowl of cold water.
- Put the water and sugar in a saucepan and bring it to the boil, then allow it to simmer for 2-3 minutes over a low heat. Add the sifted cocoa powder and the cream and whisk to incorporate it all to a smooth mix.
- Bring back to the boil and allow it to simmer for another 4-5 minutes. Take the saucepan off the heat and squeeze the excess water out of the gelatine, add the gelatine to the mixture and stir until dissolved.
- Strain the glaze into a bowl and then cover with a layer of clingfilm touching the surface to prevent a skin forming. Leave to cool and then place in the fridge for up to 4 days.
- Finally when you are ready to assemble the entremet, make the chocolate mousse. Put 150ml of cream in a saucepan with the milk and bring to the boil.
- Place the eggs and sugar in the bowl of a stand mixer and whisk for 2-3 minutes until light in colour.
- Put the chocolate in a bowl that will be big enough to take the custard as well.
- When the milk and cream has boiled, add half of it to the egg and sugar mixture and whisk again until just combined. Return the mixture to the saucepan and cook over a low heat, stirring continuously.
- When the mixture is thick enough to coat the back of a spoon and has reached a temperature of around 82-84C remove it from the heat and pass the mixture through a sieve onto the chopped chocolate.
- Mix the custard and chocolate together until emulsified and leave to one side to cool.
- Place the remaining cream in the clean bowl of a stand mixer fitted with a whisk attachment and whisk it until it forms soft peaks.
- Take the whipped cream and gradually fold it into the chocolate custard mixture until it is evenly combined. Place the mousse to one side and begin to assemble your entremet.
- To assemble your entremet, firstly ensure you have space in your freezer for the assembled entremet to fit easily into the freezer.
- Take a loose bottomed cake tin larger than the 20cm cake ring and line it with a layer of clingfilm, try to smooth it as much as possible. Make sure that you have all of your components close by and you can get to them easily whilst assembling the entremet.
- Take the 20cm cake ring and place it on top of the genoise, using a sharp knife cut around the inside of the ring so that the genoise is slightly smaller than the cake ring. Clean any crumbs from the cake ring and make sure it's clean.
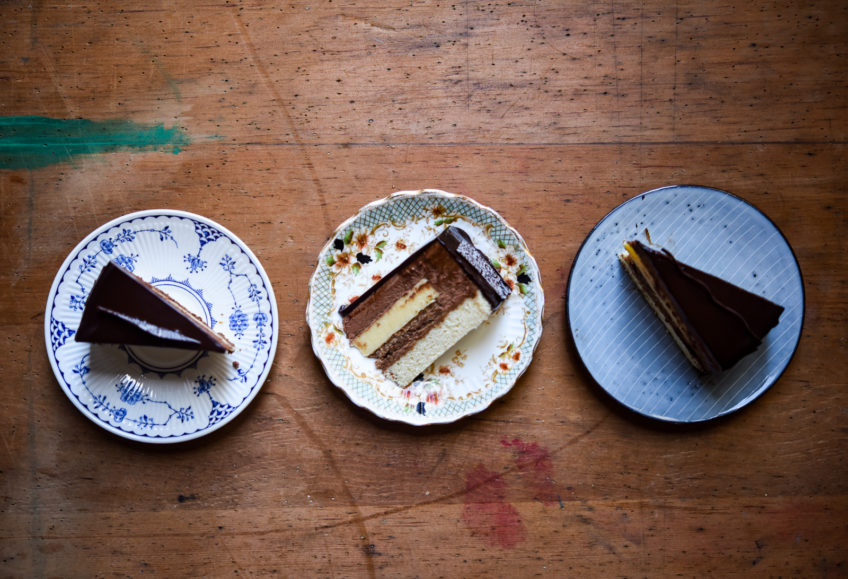
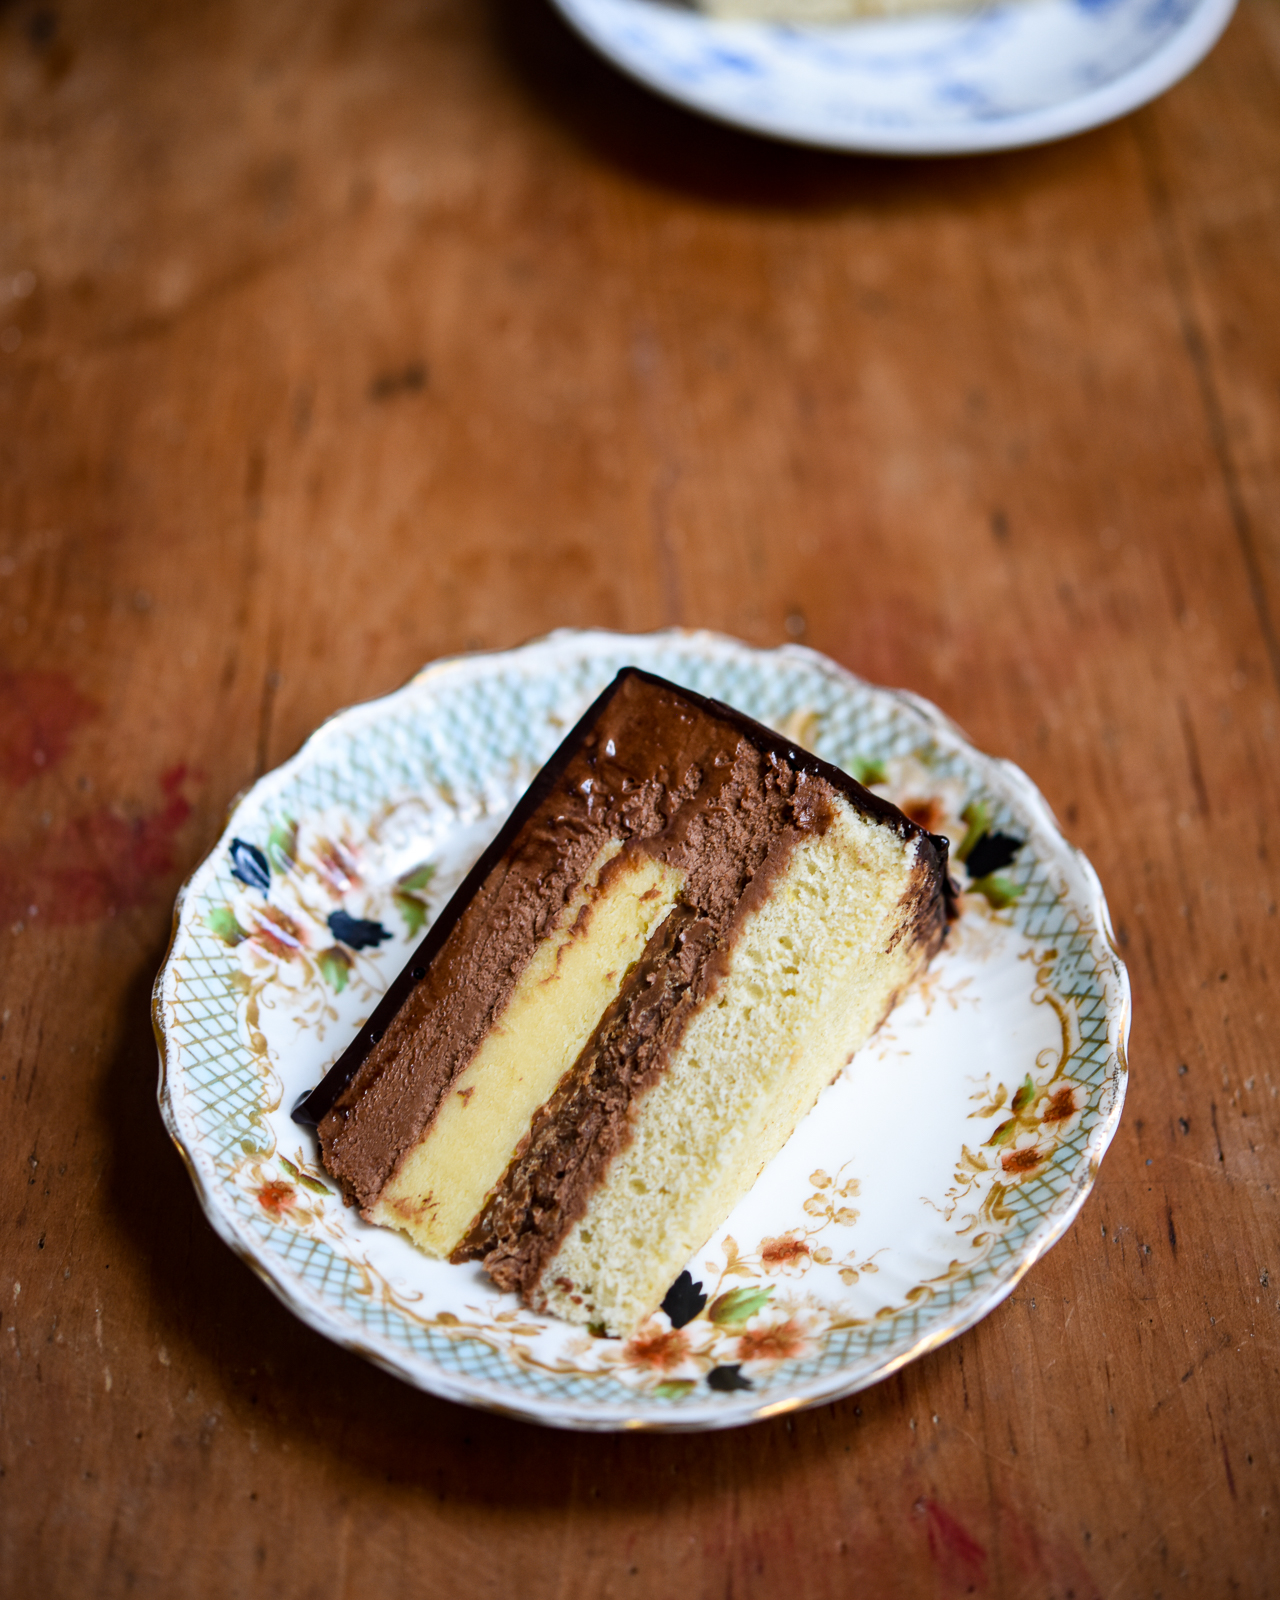
- Take the 20cm cake ring and place it inside the lined tin. Then take the chocolate mousse and place almost half the mousse in the base of the cake ring. Using a small palette knife spread chocolate mousse up the sides of the cake ring and ensure that the ring is completely covered and you can't see any that isn't covered with mousse.
- Spread the mousse in the centre of the cake ring so that it is evenly layered, take the set orange curd and place it in the centre of the cake ring and press down lightly so that there won't be any gaps between the curd and the mousse.
- Next take the praline feuilletine and place that directly on top of the set orange curd. Take the remaining mousse and fill in the sides around the set orange curd and praline feuilletine and spread an even layer over the top. You may not need all the mousse, you just need to make sure that enough room remains to add the genoise.
- Take the genoise and using a pastry brush soak it with the cointreau syrup, place it inside the cake ring and press it down gently so there aren't any gaps. Place the entremet in the freezer to set overnight.
- The next day, take the entremet and remove it from the freezer and gently peel away the bottom layer of the loose bottomed cake tin along with the clingfilm. Place the entremet on a bowl or can slightly smaller than the cake ring with the mousse side facing upwards.
- Take a chef's blowtorch and use it around the cake ring to loosen the ring. Careful not to heat it too much, or you will melt the mousse. Gently slide the cake ring from the entremet and place it back on the tin or on a board lined with clingfilm and return it to the freezer.
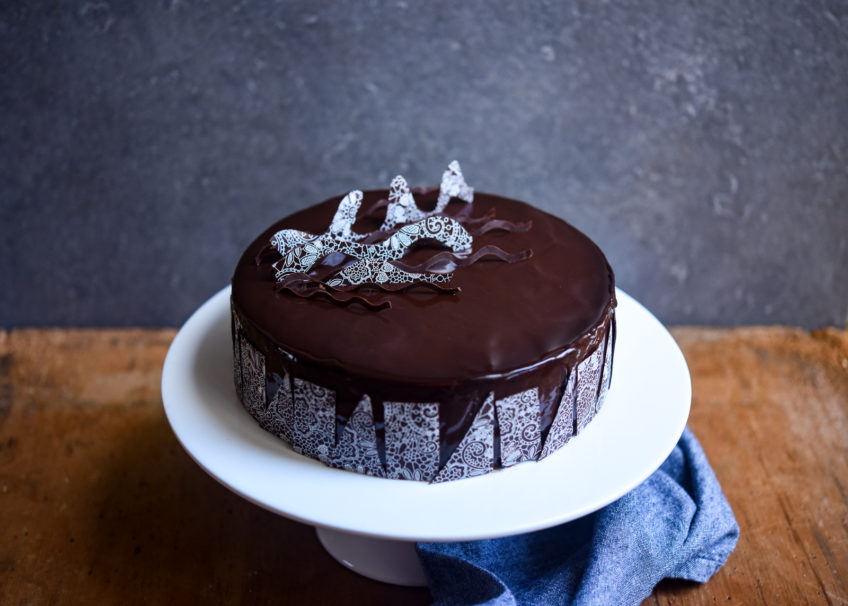
- When ready to glaze the entremet take the glaze from the fridge and heat it gently in the microwave or in a saucepan, just heat it until it is liquid, you don't want it too hot. Allow the glaze to cool until it reaches 35C.
- When the glaze is the right temperature, take the entremet from the freezer and balance it on a bowl or glass that is smaller than the entremet and stood on a baking tray to catch the excess glaze. Pour the glaze over the entremet to cover it completely. Very quickly run a palette knife over the surface of the entremet to remove the excess glaze.
- Leave the glaze to set for a couple of minutes and then using a sharp knife cut off any straggly bits of the glaze. Transfer the entremet to a plate and decorate with any decorations of your choice. This could be candied or crystallised nuts, candied peel, tempered chocolate decorations, gold leaf, macarons anything that inspires you.
- Transfer to the fridge and allow the entremet to defrost, just before serving leave to come to room temperature for 20 to 30 minutes before serving.
Notes
Thanks for reading.
Angela
I was kindly sent a Kenwood kMix and the hazelnut praline paste I used in this recipe for free. All opinions are my own.


Julia
This recipe worked out wonderfully for me. I had never made an entremet before and am so pleased with how it turned out. Thank you for posting such a quality recipe.
patisseriemakesperfect
Julia – I am so glad this worked for you. Thank you so much for trying the recipe!
Hope you enjoyed eating your hard work!
Mark nixon
If I glaze this frozen and leave in the fridge to defrost, how long will it take to defrost please?
Mark
If I leave this to defrost in the fridge once glazed, how long will it take to defrost right to the middle please?
Esther Appleyard
Hi Angela, I would like to make the orange curd from this recipe, but am lactose intolerant. Is there something else that I could use instead of the butter? Possibly lard or oil? Secondly, could I use the curd with a frozen chiboust cream (which I have used almond milk).
Regards,
Esther
patisseriemakesperfect
Hi Ester – I have to be honest I don’t have a lot of experience with lactose free baking. I wouldn’t recommend using oil or lard as i don’t think that would work in a curd. I have baked with lactofree buttter/spread, you could try using that I think it might work. I would make a batch first though and taste it before creating the entremet with it and making sure that it sets as desired.
I’m sorry I’m not sure what you mean about using the curd with a frozen chiboust cream, did you mean you want to mix the two together?
Thanks
Angela
Esther Appleyard
Hi Angela,
Thanks for your response. I do have lactose free margarine which is canola based. I will try that and see what happens.
I was thinking of doing a frozen layer of curd and once set to put a layer of chiboust cream and freeze it. So that you land up with two distinct layers.
Esther
patisseriemakesperfect
Ah now I understand, yes that sounds lovely.
Liz
Hi Angela, in instruction number 15, Cointreau Syrup, you mention adding the glucose syrup. However, in the list of ingredients, glucose syrup is not mentioned. How much glucose syrup is required? Thank you, Liz
patisseriemakesperfect
Hi Liz – thanks for your comments – sorry for the errors you found in the recipe,it was a long one to write out. Just to confirm Step 15 should never have contained a reference to liquid glucose, it was meant to be the vanilla extract. Thanks for letting me know about the errors. Angela
Liz
Hello Angela, how tall of a cake ring do I need. In step 31, you stay to spread the mousse up the sides of the cake ring until all surfaces are covered. Cake rings come in different heights. Please advise. Thank you!
patisseriemakesperfect
Hi Liz – the cake ring you need is 20cm by 6cm – you can get them on amazon if you don’t have one. Thanks
Angela
liz
Hi Angela thanks for the quick reply. In your reply you say 6 cm tall and under “equipment” you say 4 cm tall. Please advise. Thanks! Liz
patisseriemakesperfect
Hi Liz – I’m so sorry for the confusion, that is why you shouldn’t edit things late at night! It’s 20cm by 6cm. Sorry again! x
Liz
Hi Angela, I made the orange curd last night and followed directions, but it didn’t turn out right. I think the eggs ended up curdling. Any tips to prevent this from happening? When I’ve made lemon curd in the past, it was just the yolks and I didn’t beat the eggs in a mixer. Could I have added the orange juice too hot? Beat too much air in the eggs? Thank you! Liz
patisseriemakesperfect
Hi Liz, I’m afraid if they curdled then you added the orange juice when it was too hot. You also only add half the orange juice, this also helps with the hot liquid not curdling it. Any other problems let me know. Thanks Angela
Robyn
Thanks Angela, these instructions and tips are just what I need!
patisseriemakesperfect
So pleased that they can be of help Robyn!