After last week’s course at Miele, I was feeling very inspired and racing to get back in the kitchen this week. I decided to tackle something that I had wanted to make for quite some time and to make a return to true patisserie, not that I haven’t enjoyed the muffins and the biscotti.
I chose a macaron cake, you don’t see many macaron cakes and after a quick google search, I predominantly found pictures and recipes for cakes, with small macarons stuck to them. Pierre Herme is known for making macarons of this size and the spiral piped design is one of the signature features of this bake.
The recipe is quite labour intensive as the filling combines a creme patissiere with an Swiss meringue and some pistachio paste along with fresh raspberries. The pistachio paste came from an online site called Sous Chef, they have a large range of items available here and they also have a great recipes section which includes a lot of other recipes you can make with the pistachio paste.
All of the recipes needed for this cake will be included at the end of the post as well as in the ‘Recipes’ section of the blog.
I decided I also wanted to have another go at making tempered chocolate decorations and I have to admit, I’m really pleased with how this cake and it’s decorations turned out. If you don’t feel like making a large macaron cake, you can always make smaller macarons. This recipe would probably yield about 36 filled macarons, but I cannot be definite about that, as I haven’t tried making individual macarons from this recipe.
The macaron mixture is made using an Italian meringue which is made using a sugar syrup added to the egg whites and added to a paste made of egg whites, ground almonds, icing sugar and pistachios. A small amount of food colouring is added to give them a nice green colour. I like to use the food colourings produced by MSK, more information can be found here. This is a great site and they also sell food colourings that can be used to color cocoa butter, so that you can make some really interesting coloured decorations.
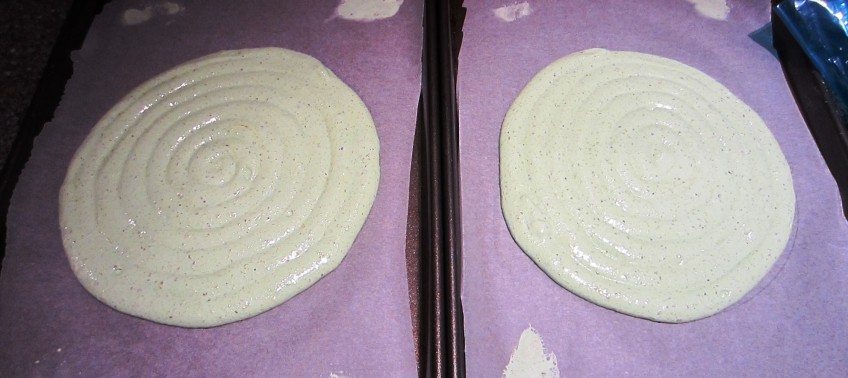
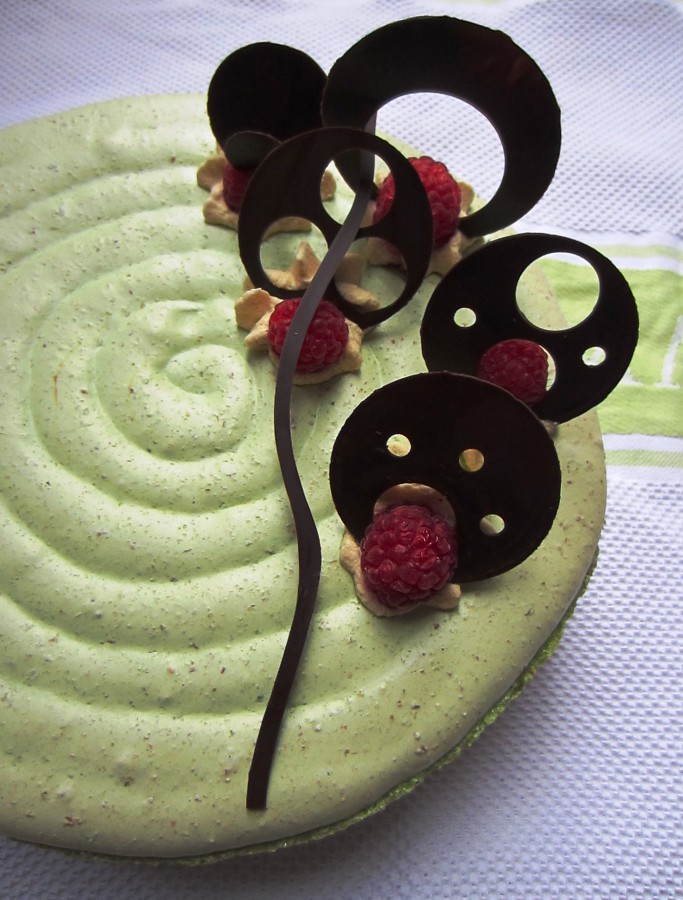
The mixture is then piped into two 20cm circles, starting in the centre and spiralling out towards the edge, to be honest out of the entire recipe, this was the part I was most worried about, but it’s actually really easy and the mixture merges together really smoothly. Normally with macarons you tap the pan on the side to remove any bubbles and to flatten the macarons. As I have gone to the trouble to pipe this pretty spiral, you really don’t want to tap these pans, just put them in the oven as they are.
Sorry for the shocking light in the picture, but the transition to Autumn is affecting my picture taking in the evening.
The macarons are baked for 15 mins, turning once while baking, so that they cook evenly. There should also be enough mixture left over to make 20 shells of 4cm diameter so that you will have 10 small macarons as well. These only need 10mins to cook.
When the macarons have cooled completely you can remove them from the paper. If you don’t let the macarons cool before removing them, you’ll find you have a shell and the centre of the macaron is left on the tray.
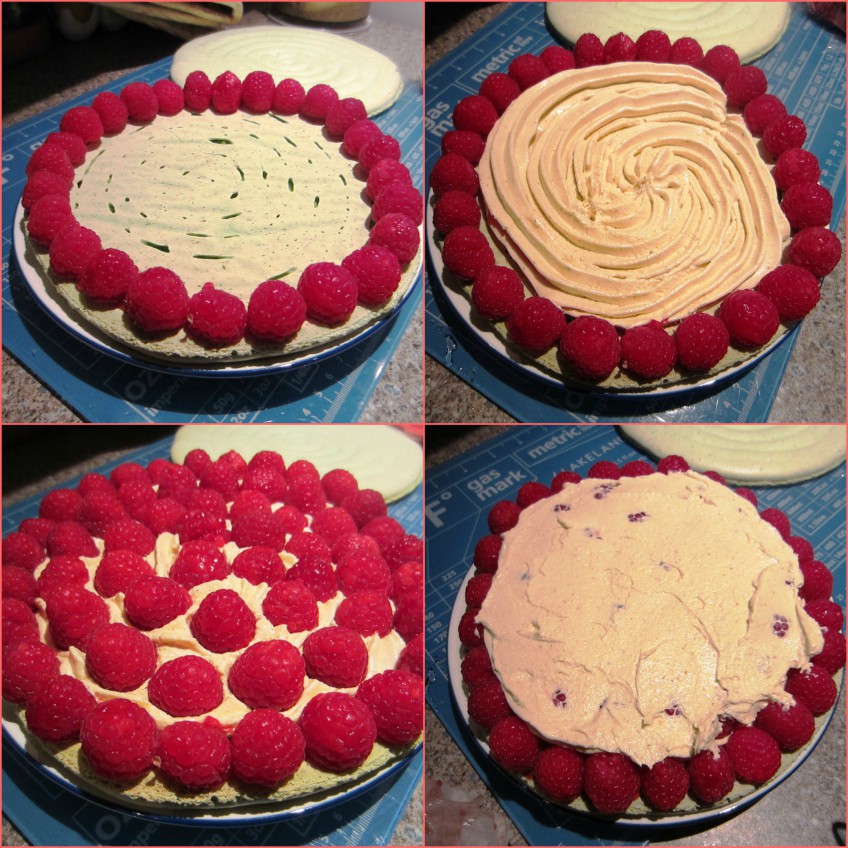
To fill the macaron, you need to pipe a ring of jam around the outside of a flat side of the macaron and then sandwich raspberries on top. Then pistachio cream is piped in a spiral in the middle and topped with more raspberries, arranged in rings.
Then more pistachio cream is added and the final macaron is placed on top.
For the smaller macarons, pipe a circle of pistachio cream around the outside edge, place a raspberry in the middle and then pipe another small blob of pistachio cream and top off with another macaron.
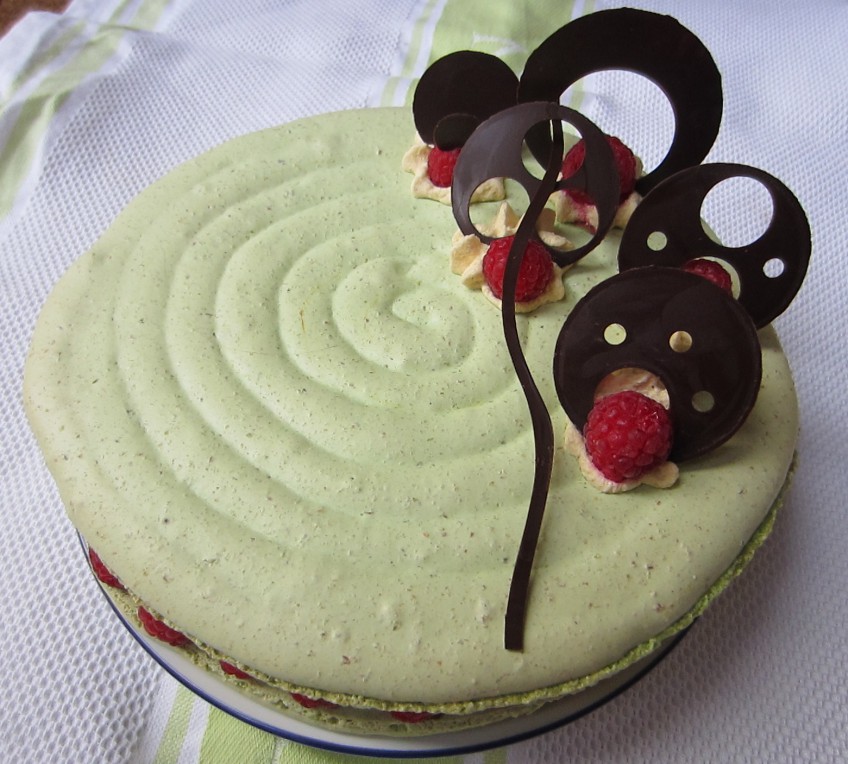
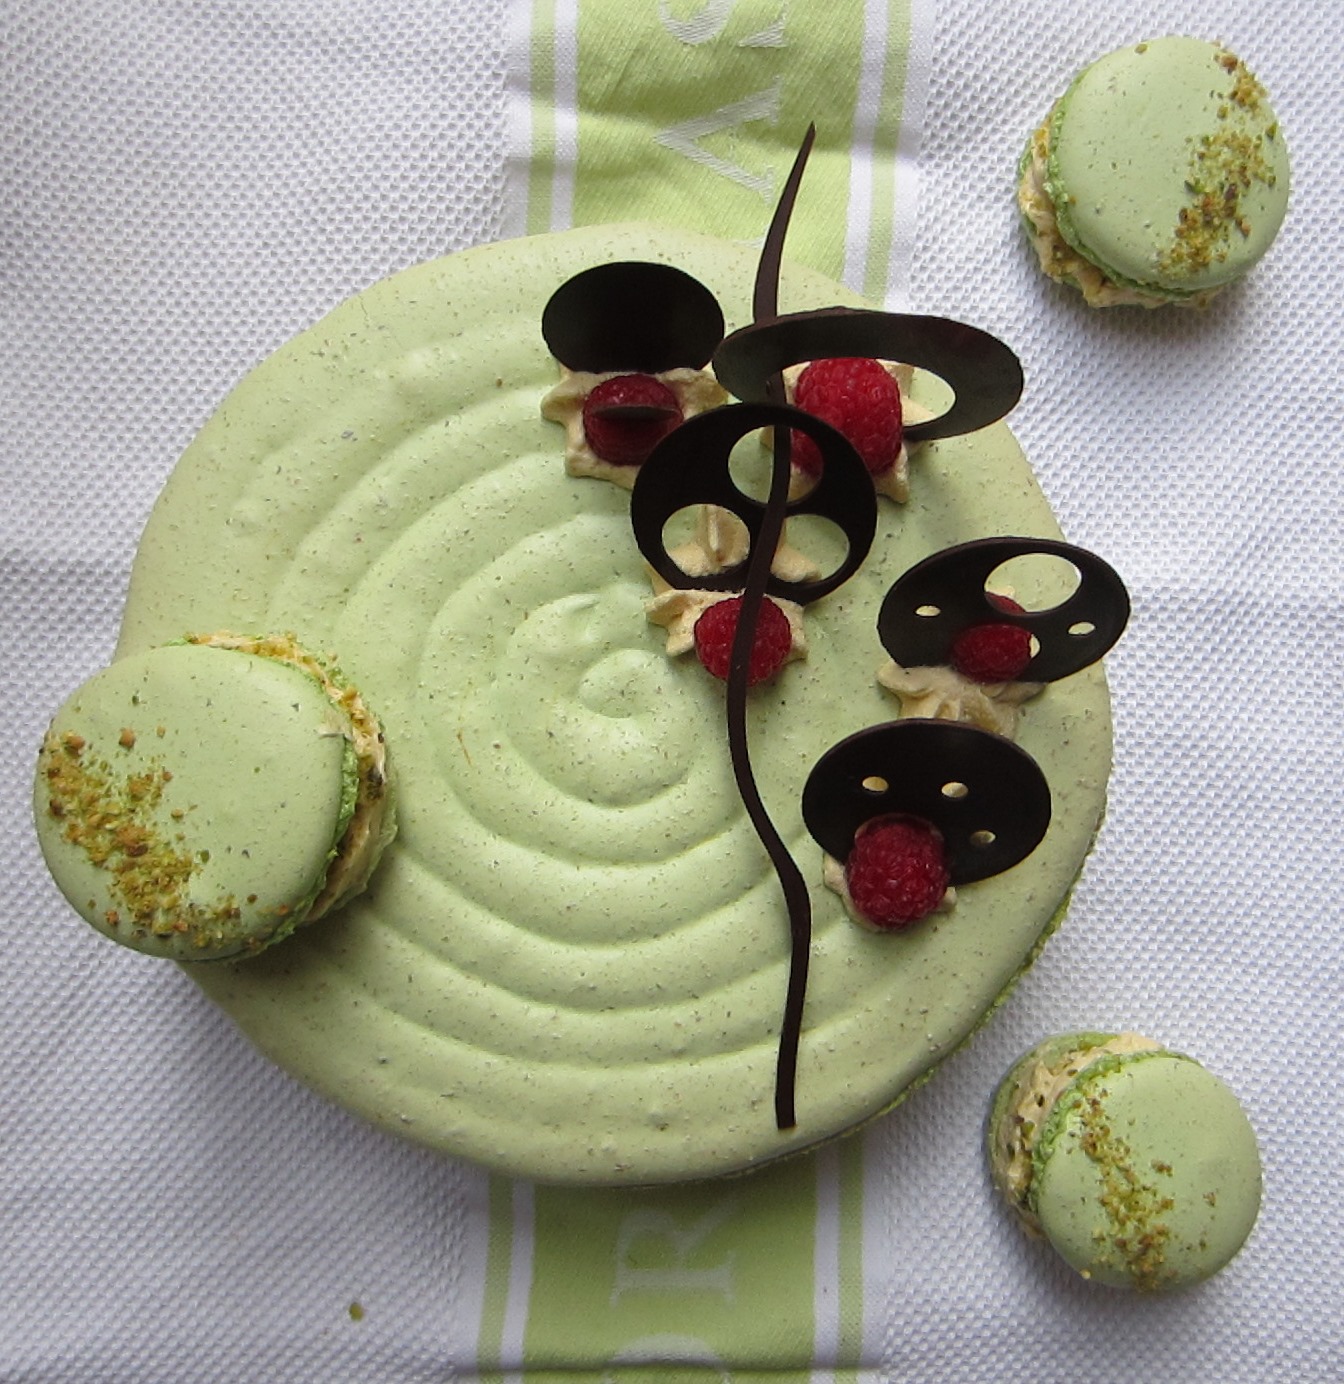
I chose to decorate the top of the cake with tempered chocolate decorations, raspberries and pistachio cream to act as a glue, the smaller macarons are decorated with chopped pistachios before baking. If anyone would like me to do a post about chocolate decorations and chocolate transfer sheets, do let me know in the comments as this is something I would be happy to do.
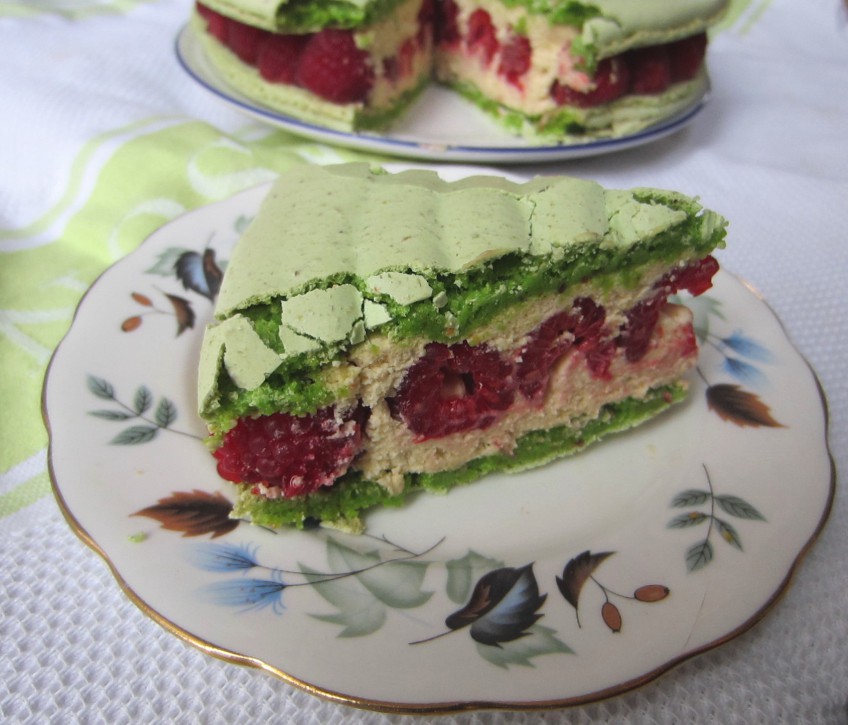
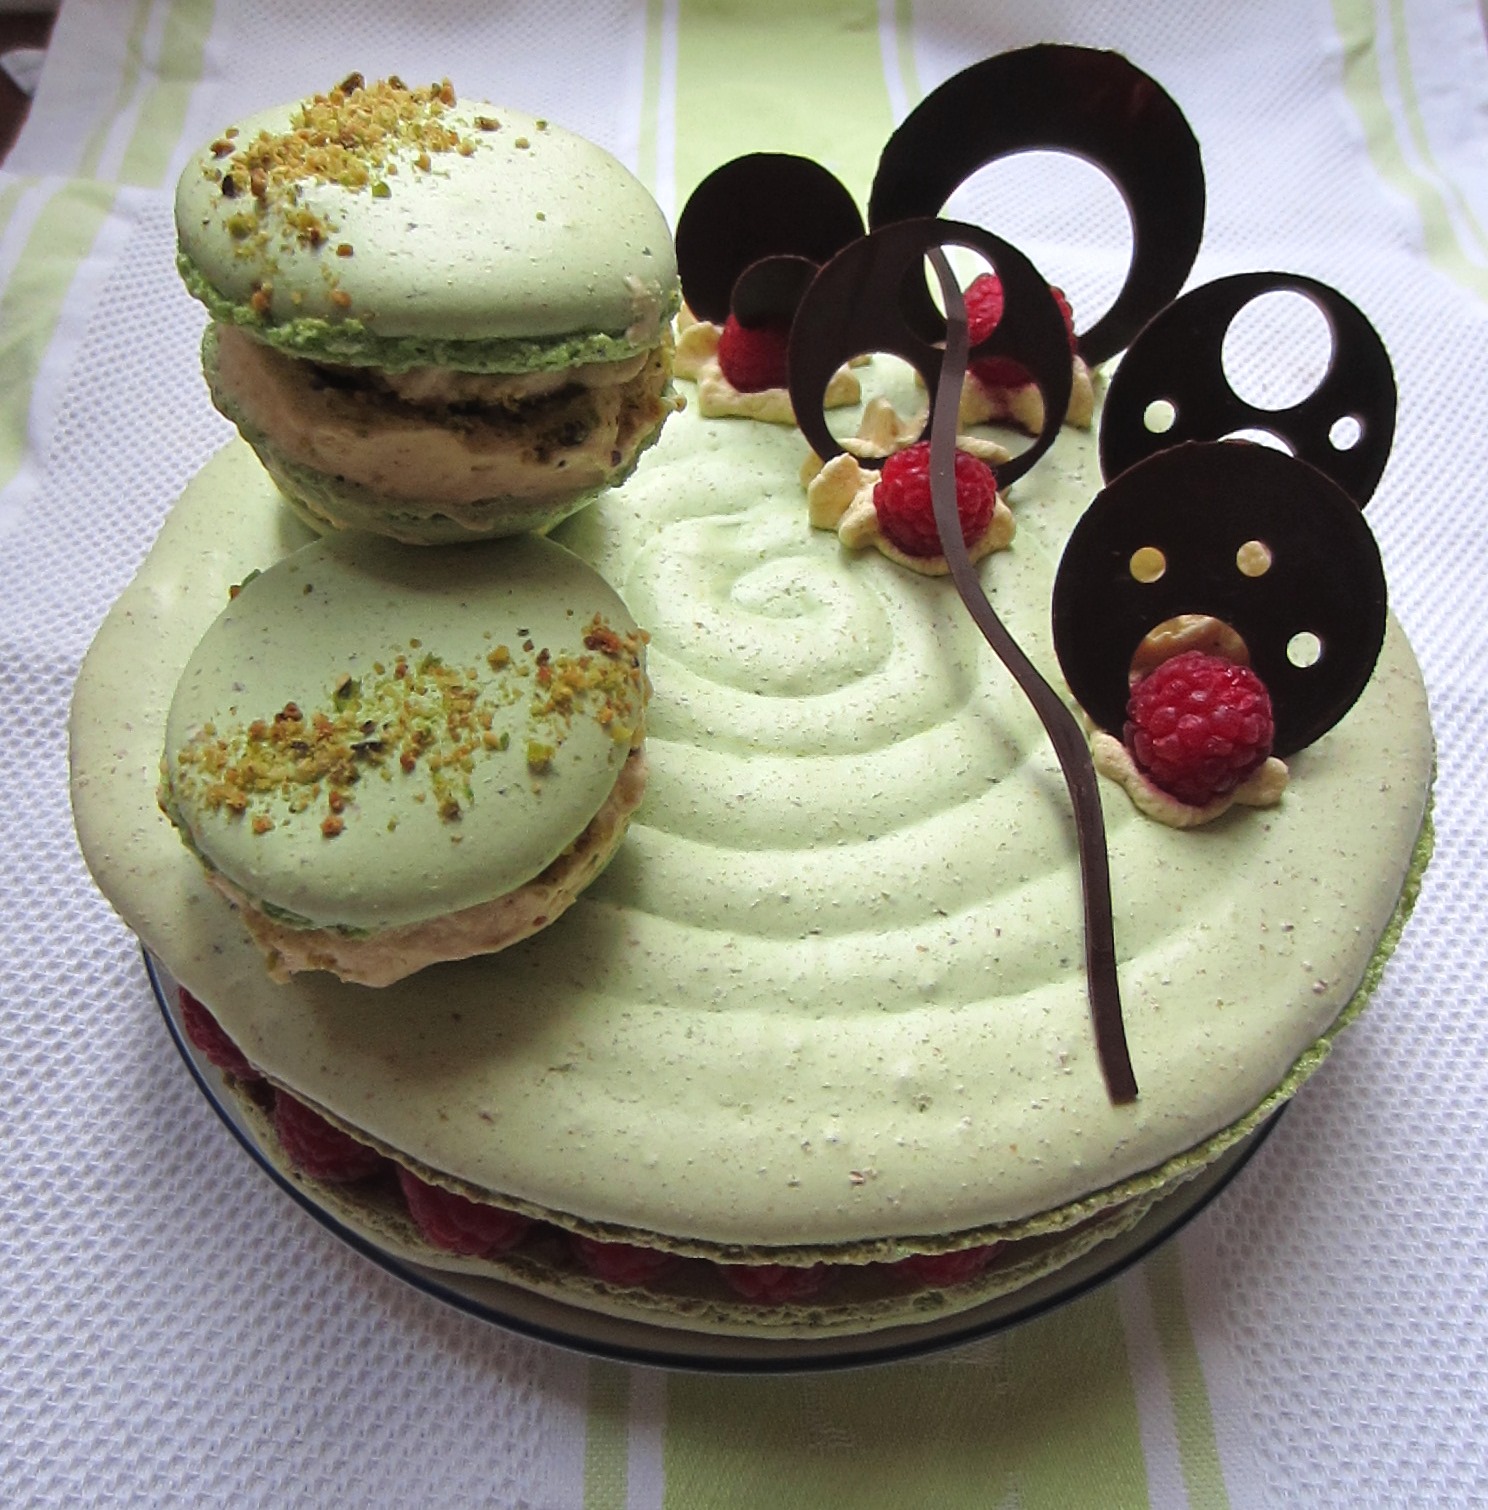
So here is the finished cake and macarons.

PISTACHIO & RASPBERRY MACARON CAKE
Ingredients
- 130 g Ground Almonds
- 200 g Icing Sugar
- 115 g Shelled and Unsalted Pistachios
- 50 ml Water
- 200 g Granulated Sugar
- 150 g Egg Whites about 5 eggs
- Green Food Colouring
- Pistachio Cream see recipes section
- 50 g Raspberry Jam
- 400 g Raspberries
Instructions
- Preheat the oven to 170 degrees and line two baking trays with baking parchment. Draw two 20cm circles on the reverse of the baking parchment to help with the piping. Also draw 20 smaller circles on another piece of baking parchment, the standard size is usually a diameter of 4cm.
- Add the water and sugar to a pan and stir over a medium heat until the sugar dissolves.
- Put half of the egg whites into a stand mixer and whisk them on a medium speed until frothy.
- Bring the syrup to a boil and heat until it reaches 121 degrees.
- Pour the syrup in a slow steady stream into the egg whites as they are being whipped on a high speed. Keep whipping until the meringue forms a stiff peak, about 5mins.
- Add the green food colouring and mix through.
- Grind the ground almonds, 100g of the pistachios and icing sugar together in a food processor and then sift them into a clean bowl.
- Add the remaining egg whites to this mix and beat it, until it forms a paste.
- Add a third of the meringue to the almond paste and beat it in thoroughly.
- Fold through the remaining meringue, ensure the ingredients are mixed thoroughly.
- Put the macaron mix into a piping bag and pipe out two circles working in a spiral from the centre, then pipe out the small macarons, using the remaining mixture.
- At this point chop the remaining pistachios and sprinkle them on top of the large and small macarons.
- Tap the bottom of the tray for the smaller macarons only. Place the large macarons in the oven for 15mins. Turn the trays halfway through cooking to ensure an even bake.
- Then cook the smaller macarons for 10mins.
- Let the cooked macarons cool completely before trying to remove them from the tray.
- Using a piping bag, pipe a line of raspberry jam around the flat inside of one of the large macarons.
- Arrange raspberries on the ring of jam, so they are touching.
- Pipe a thin spiral of pistachio cream inside the raspberries.
- Cover the cream with rings of raspberries.
- Pipe more pistachio cream over the raspberries, but don’t go too the near edge and spread it round with a palette knife.
- Sandwich a plain macaron on the top and add any decorations of your choice.
- With the smaller macarons, pipe a ring of the pistachio cream around the edge and sit a raspberry in the middle, add a tiny blob of cream and sandwich a macaron on top.
- Place the smaller macarons in an airtight container for at least an hour, the larger one will be fine in the fridge on a plate, but if you can wait, they’ll be much better the next day. They should last for 2-3 days in the fridge.
PISTACHIO CREAM
Ingredients
- 2 Eggs
- 1 Egg Yolk
- 80 g Granulated Sugar
- 230 g Unsalted Butter
- 1/2 The Creme Patissiere Recipe in the Icings & Fillings Section
- 30 g Pistachio Paste I bought mine online from Sous Chef
Instructions
- Place the whole eggs, egg yolk and sugar in the bowl of your food mixer. Set over a saucepan of barely simmering water and whip with a handheld electric whisk until pale and thick, similar to a light mousse.
- When the mixture is hot to the touch, remove the bowl from the heat and whip at a low speed on your food mixer, until lukewarm.
- Add the butter in several batches, whipping after each addition until smooth and cool.
- Add 170g of Pastry Cream (creme patissiere) and whip at a low speed, add the pistachio paste and whip until all the ingredients are combined and smooth.
Creme Patissiere
Ingredients
- 1 Vanilla Pod (or 1 tsp Vanilla Bean Paste)
- 500 ml Milk
- 120 g Granulated Sugar
- 50 g Cornflour
- 120 g Egg Yolks approx 6 eggs
- 50 g Unsalted Butter
Instructions
- Split the vanilla bean lengthwise and scrape out the seeds.Bring the milk, vanilla pod or extract and seeds to a boil in a saucepan over a medium heat. Remove from the heat and let infuse for 10 minutes.
- Meanwhile combine the sugar and cornstarch(or custard powder) in a medium bowl. Add the egg yolks.Whisk just until the sugar is combined, do not let it get too pale.
- Whisk a third of the milk into the egg mixture to loosen it.Whisk in the remaining milk and return the mixture to the saucepan, straining it through a fine sieve and cook over a medium heat, whisking constantly.
As soon as the pastry cream begins to thicken, remove it from the heat. - Whisk in the butter until smooth.Scrape the pastry cream into a bowl and cover with a layer of clingfilm, pressing it down so it touches the surface of the cream. This will stop a skin forming.Allow to chill completely.
As you can see from the recipes above, this recipe is made up of a few components, I made my pistachio cream and creme patissiere a day in advance and stored it at room temperature until I was ready to use it.
So have you had macaron cake before? I can say it’s even more delicious than the wonderful macaron, so do please give this recipe a go.
Thanks for reading.
Angela
Coco in the Kitchen
This is a show-stopper!
Just stunning.
Thanks for sharing your recipe. I can’t wait to TASTE it!
patisseriemakesperfect
Thanks Coco, I’m so glad you like it!
phoebe
Hi, i was wondering if you let your macarons rest to form a skin/shell before baking?
Thanks
Phoebe
PatisserieMakesPerfect
Hi Phoebe – I always use an Italian meringue method when making macarons and I don’t let the shells rest. I think if you use French meringue method it is necessary to let the shells rest before baking.
I’ve never rested the shells and the recipes I’ve used doesn’t request you to, but feel free to try, you’ll normally make a few trays when following a recipe, so you could rest some and not others.
Good luck and let me know if you have any other questions.
Angela
phoebe
Thanks so much – made today and delish!! I had never made macarons via the italian meringue method but it was great. Thank you for the lovely recipe.
Phoebe
PatisserieMakesPerfect
Hi Phoebe – so glad the recipe worked out well. I was anxious the first time I made Italian meringue, but it’s actually very easy.
I’m so pleased you enjoyed it. x
Cornelia
Hello Angela,
I was wondering if you could explain how to make the chocolate decorations. I’d like to try your recipe next week and your cake looks great!
Thank you so much,
Cornelia
PatisserieMakesPerfect
Hi Cornelia,
Thank you for your lovely comments – to make the chocolate decorations you need to use tempered chocolate (if you’re not sure how to temper chocolate let me know), I use the seeding method, there are lots of videos on YouTube.
You will also need some food grade acetate sheets or strips (I use Sous Chef for this), take a cookie cutter of your choice and a large piping nozzle (if you are making hoops).
Spread a little of the tempered chocolate onto the acetate strip using a palette knife, give it a minute to dry a little and then using your cookie cutter (any size you want, from memory I think I used 3cm), cut out circles and then using the large round end of the pipping nozzle cut out circles from the centre to create a hoop. You may need to wipe the excess chocolate from your cutters as you go, so that they still cut cleanly – use kitchen towel not water as you don’t want to get them wet.
Leave the chocolate hoops on the acetate and on a flat surface until they dry. Then gently peel them off and they’re ready to use, they’ll also keep in an airtight container too.
A few tips – don’t put the hoops in the fridge to speed up the setting and also when you’re working with chocolate don’t cook other things at the same time i.e. on the hob, the humidity and moisture is your worst enemy and will make tempering the chocolate more difficult.
I hope all that helps, do feel free to email me if you need anything further patisseriemakesperfect(at)gmail(dot)com
Good luck and let me know how it turns out.
Angela
Jodie Dodd
I love the look of this cake! The decorating is fantastic and the chocolate decorations give it a sort of retro feeling. This cake would look great on the table at Christmas. 🙂 x
PatisserieMakesPerfect
I know what you mean about being retro. There’s something very 1960s about the hoops isn’t there? It tasted amazing Jodie!
PatisserieMakesPerfect
Thank you Fran. So sorry I only just saw this – it was put in my spam folder. I will be doing a post on decorations/glazes etc soon as some of them are so easy to make despite how difficult they look. Thanks for the kind comments, I don’t think I could handle the stress of the bake off, I’d be gone in week 1 🙂
emily
This is fantastic! What a great idea for a cake and lovely colours too xx
PatisserieMakesPerfect
Thanks Emily, it really is pretty isn’t it? Even I was surprised at how well it came out!
Helen Costello
This is pure perfection! I am so impressed by your talent -Good to know someone else struggles with the light in an evening too! Thanks once again for joining in with #Bakeoftheweek New Roundup and linky open later x
PatisserieMakesPerfect
Thank you Helen. I am really pleased with this and I don’t know what I’m going to do after the clocks change this weekend!
Lucy Parissi
I am hugely impressed with this Angela! It really looks gorgeous and I know it’s not easy to bake large macarons from personal experience! Absolutely gorgeous – wish I could have eaten a slice! Thanks for linking to #CookBlogShare
PatisserieMakesPerfect
Thank you Lucy! I have to say it did taste delicious. I think I might actually prefer the cakes to the smaller macarons. Thanks for commenting. #CookBlogShare
The Introverted Chilli
This is such a great idea!
PatisserieMakesPerfect
Thank you, it’s really simple to do and the flavour is amazing!
Charlotte Oates
I bet you’re proud of this one, it looks beautiful (and yummy). I’ve never thought of making a giant macaron before, such a great idea!
A very impressive first attempt at tempering chocolate too.
PatisserieMakesPerfect
Thanks Charlotte, well I’ll be honest, I’ve tempered chocolate a few times before, so this wasn’t strictly a first attempt at that. The large macaron was a worry, but the fresh fruit filling is so delicious.
Oana Olguta
Wow, looks amazing! I gave up on macarons after more than 5 failed tries. I have a gas oven and it’s so tricky to keep a steady temperature. Until I buy myself a better oven, I admire your work though. Congrats, looking as it should!
PatisserieMakesPerfect
Thank you Oana, yes I have a fan oven. I still get hot spots, but i just have to turn halfway through baking usually. Thank you for the kind comments.